Web Editor
Welcome to this tutorial on the Chainweaver Web Pact Editor!
In this tutorial, you’ll learn about the Chainweaver Web Pact Editor, a powerful tool for developing smart contracts with Pact.
Topics covered in this tutorial
- Introduction to the Editor
- Navigation Bar
- Code Editor
- Tool Panel
The goal of this tutorial is to get you familiar with each of the editor’s powerful features so that you can use it to build smart contracts using pact.
The Chainweaver Web Pact Editor is a robust development environment for Pact. It gives you access to many useful features for smart contract development. These features allow you to easily build and test contracts before deploying them to either your private chain or
Chainweaver Web Pact Editor Tutorial
Subscribe to our YouTube channel to access the latest Pact tutorials.
Introduction to the Editor
The Chainweaver Web Pact Editor is a web-based REPL that allows you to write Pact code, manage keysets, deploy smart contracts, and explore other smart contracts. These and many other features make the online editor an ideal place to build, test, and deploy your smart contracts.
To get started with the Chainweaver Web Pact Editor, navigate to
.
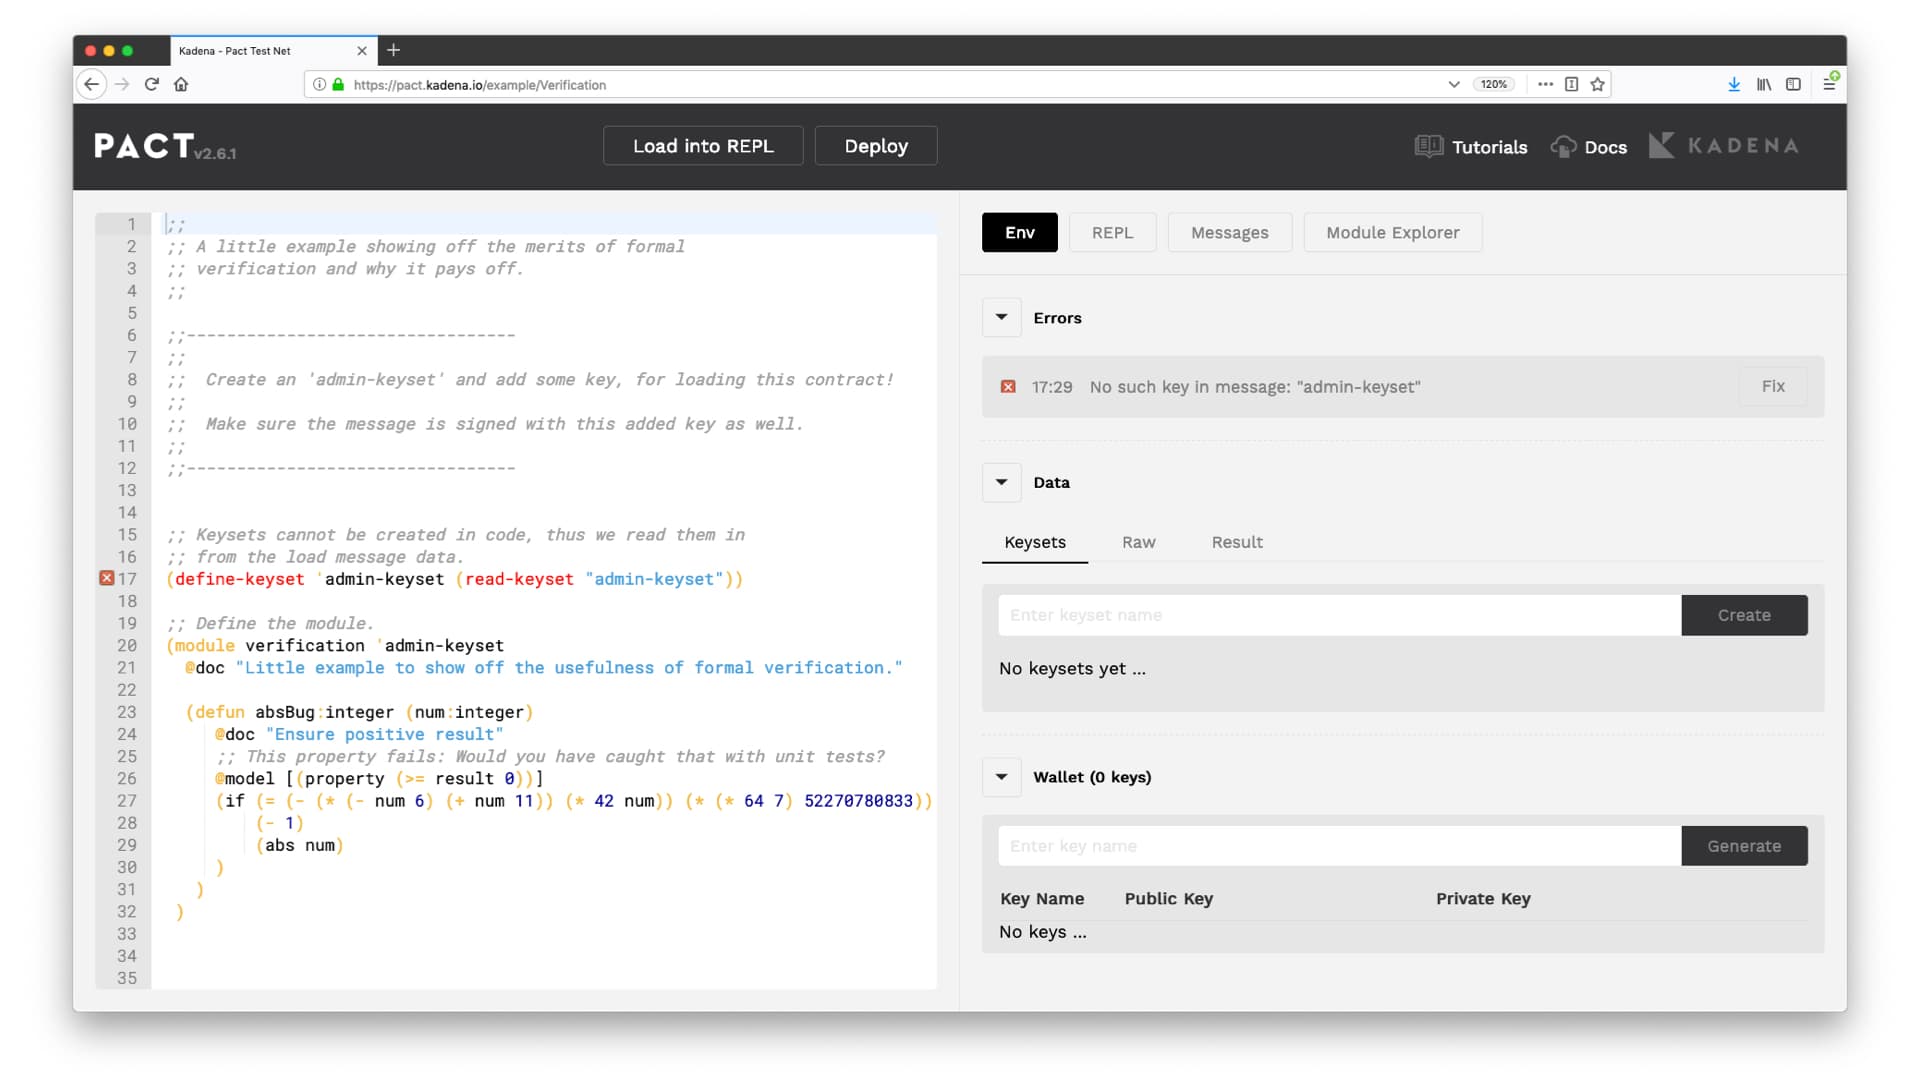
Basic Layout
Here you'll see a clean and intuitive layout, giving you access to the tools you need without cluttering the developer experience.
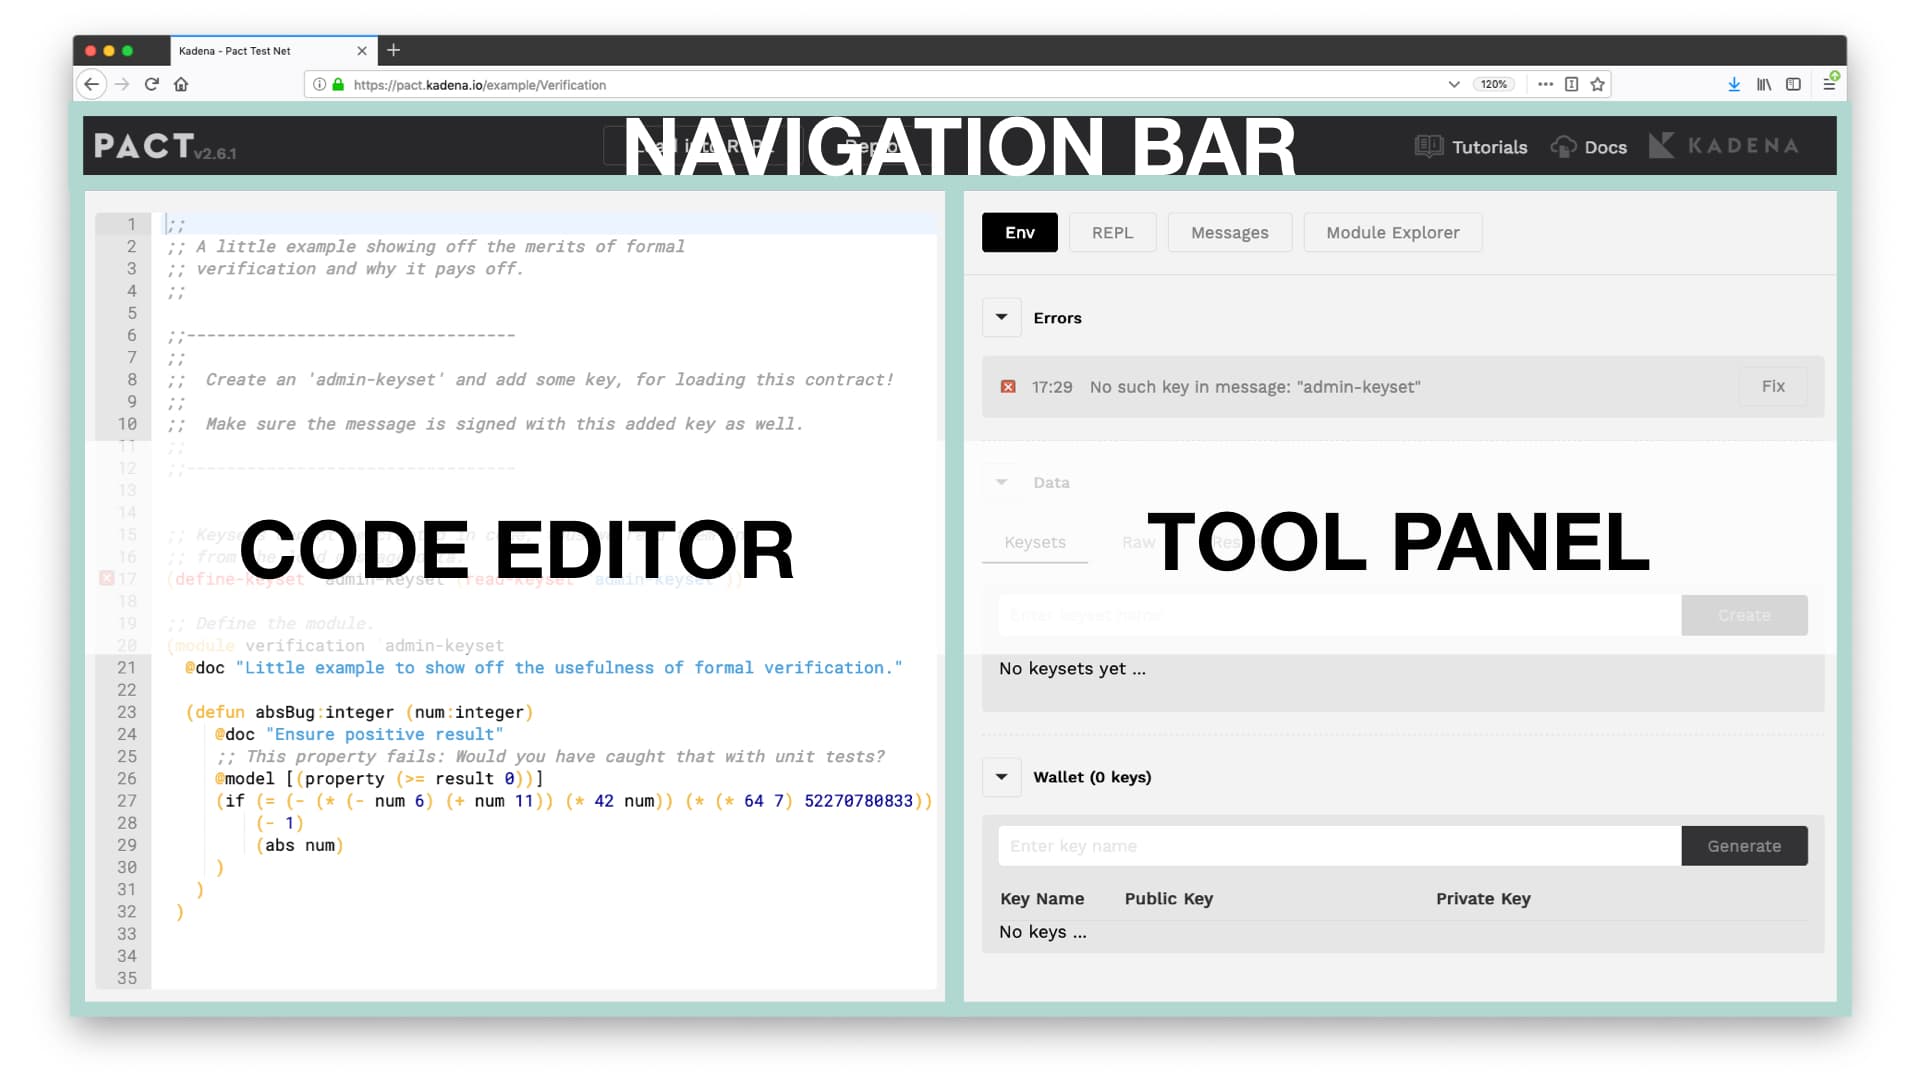
The interface consists of three main sections; the code editor, the navigation bar, and the tool panel.
| Code Editor | An area for writing and editing your smart contracts. |
| Navigation Bar | Includes relevant documentation links and allows you to load code into the REPL or deploy smart contract. |
| Tool Panel | Provides essential functionality needed to manage keys, interact with the REPL, view messages, explore modules, and more. |
Each of these features helps provide an intuitive developer experience. These features make smart contract development both fun and rewarding.
Navigation Bar
You can locate the navigation bar at the top of the screen. It allows you to load your contract into the REPL, or to deploy the contract to a live network. It also shows the Pact version number and links to these tutorials, the Pact language documentation and the Kadena homepage.
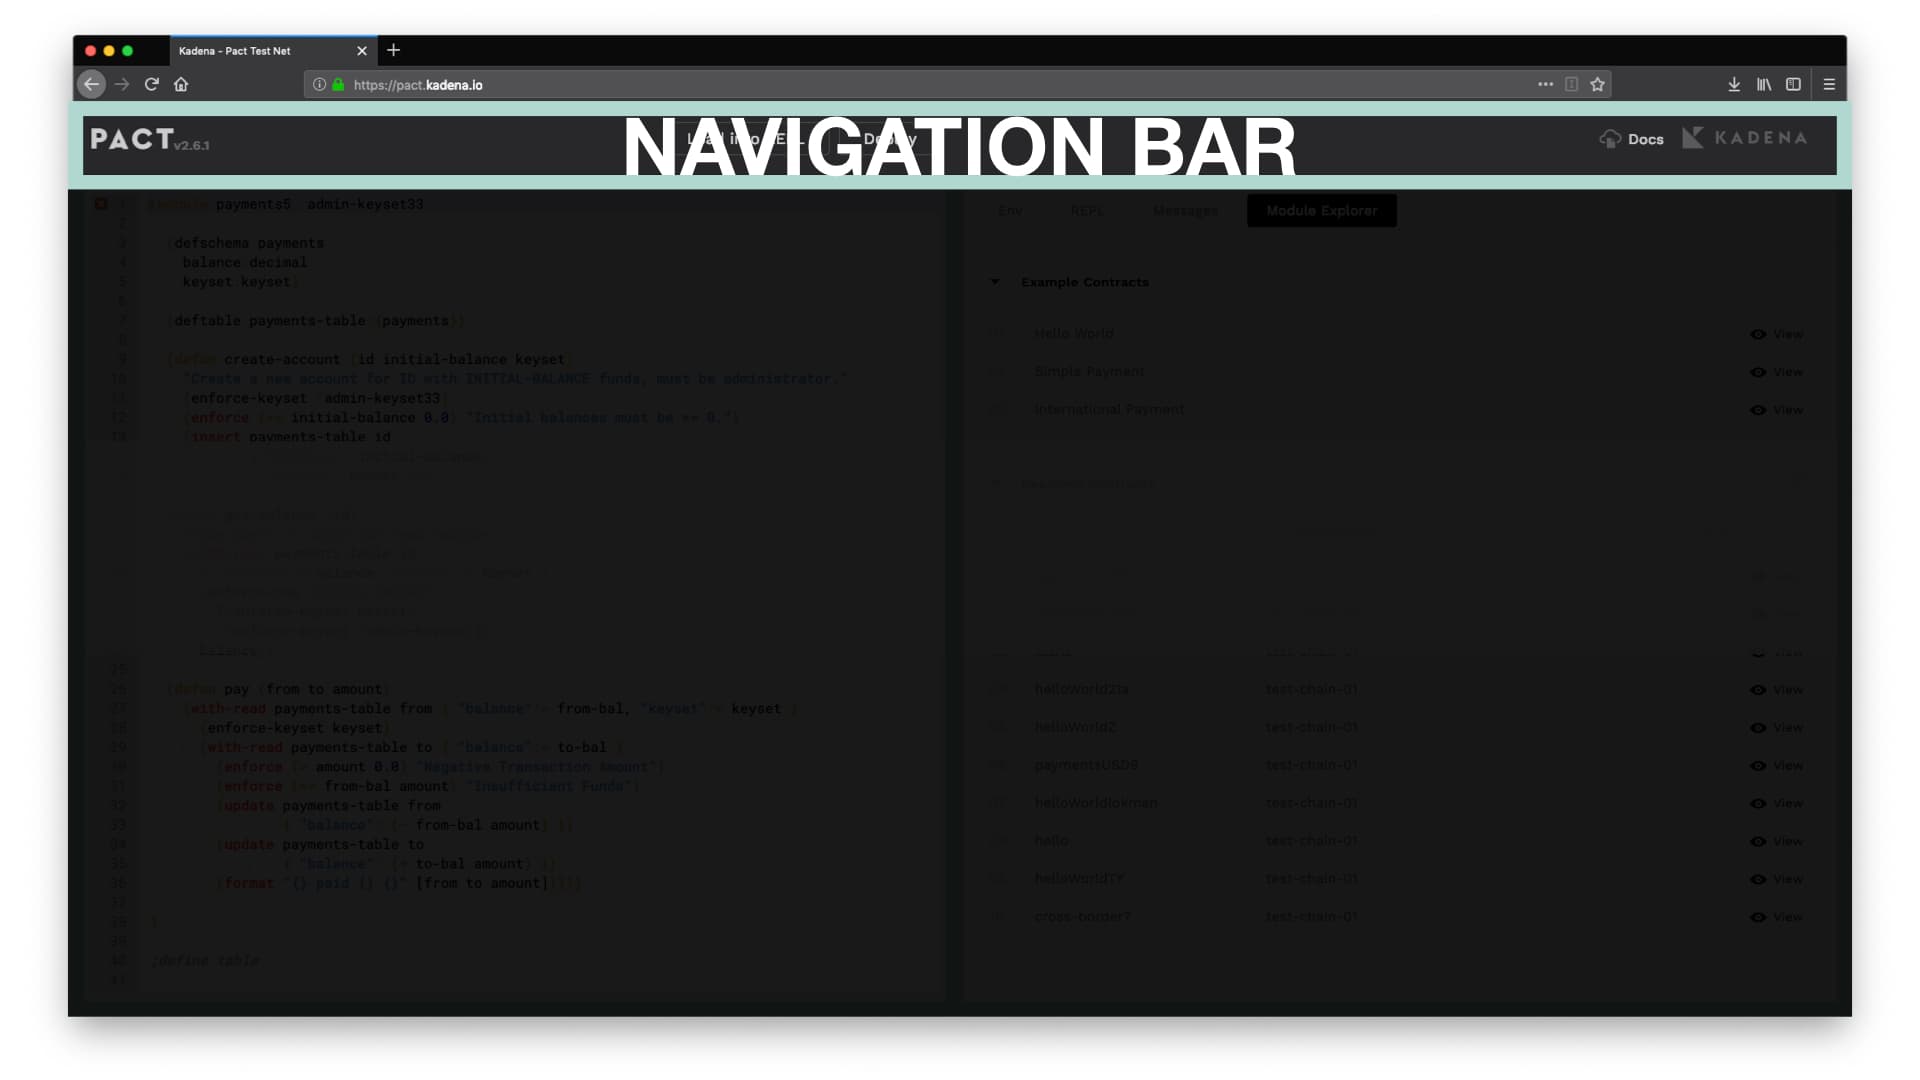
Load into REPL
Selecting “Load into REPL” loads text from the editor into the REPL and executes the commands. After selecting this button, you’ll also notice that it opens an interactive terminal you can use to run Pact commands. You’ll use this feature often when exploring the REPL later in this tutorial.
Deploy
The deploy button is used to deploy smart contracts onto the blockchain. Select Deploy to view the features available to you. Here you’ll have the option to choose a server, set a few settings, sign the transaction and more. This tutorial doesn't go over the details of each of these options. If you'd like, view Hello World with Pact for a full description of smart contract deployment with the Web Editor.
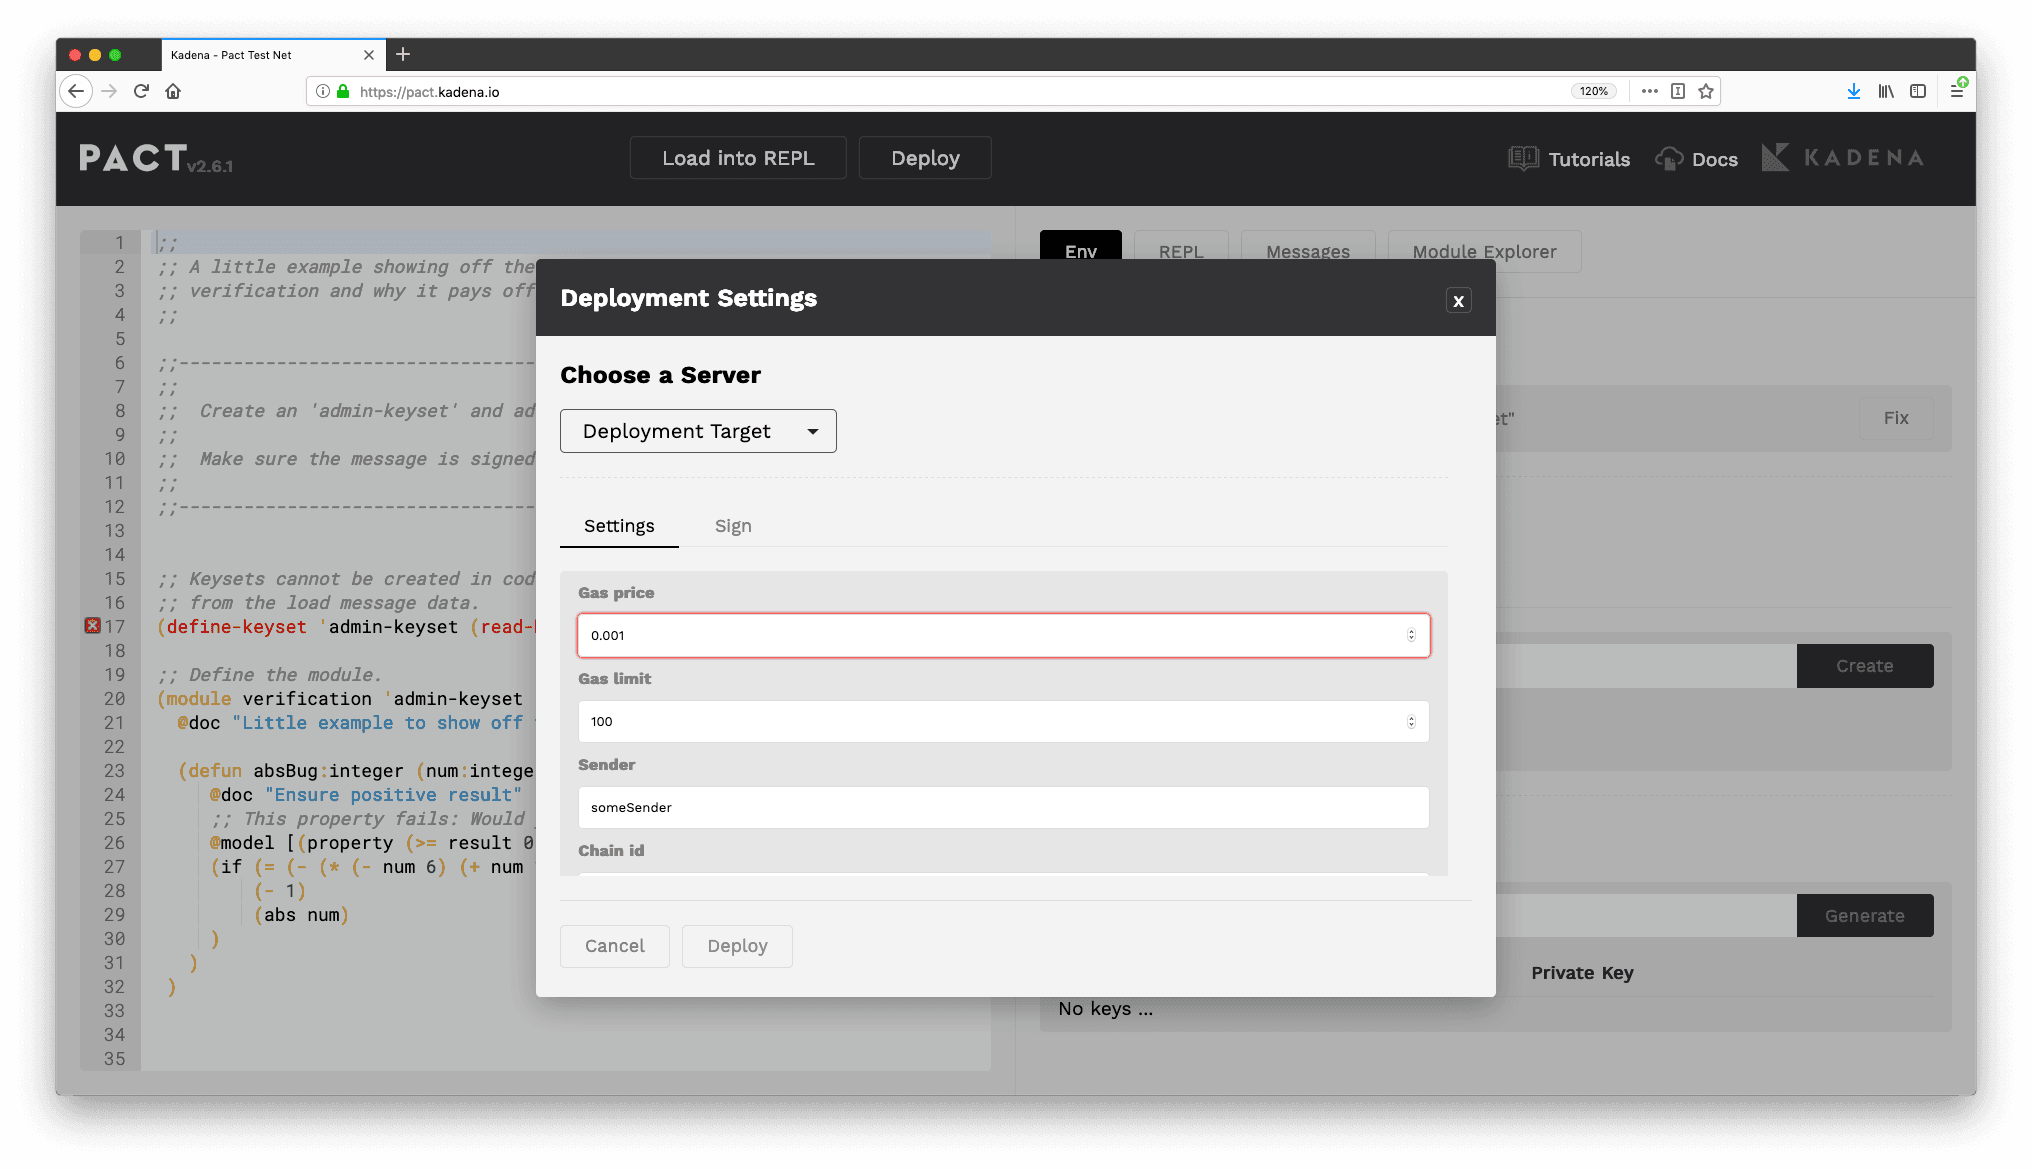
You can close this window by either hitting cancel or the X on the top right.
Navigation
The navigation bar also provides some necessary information and links to help you get started with Pact.
Pact Version 2.6.1
At the time of this tutorial, Pact is currently on version 2.6.1. As this continues to update its likely that some of the features we explore will continue to improve.
Available Links
Links to the Pact tutorials, developer documentation and Kadena homepage can also be found on the navigation bar.
| Documentation | Provides an in-depth look at the Pact programming language. |
| Tutorials | Learn more about Pact by completing tutorials like this. |
| Kadena | Explore the Kadena blockchain, which is the enterprise-grade blockchain that Pact runs on. |
You can also join the newsletter to stay up to date on the latest Kadena and Pact information here.
Code Editor
The code editor provides a familiar editing interface. It comes equipped with both inline error reporting and formal verification.
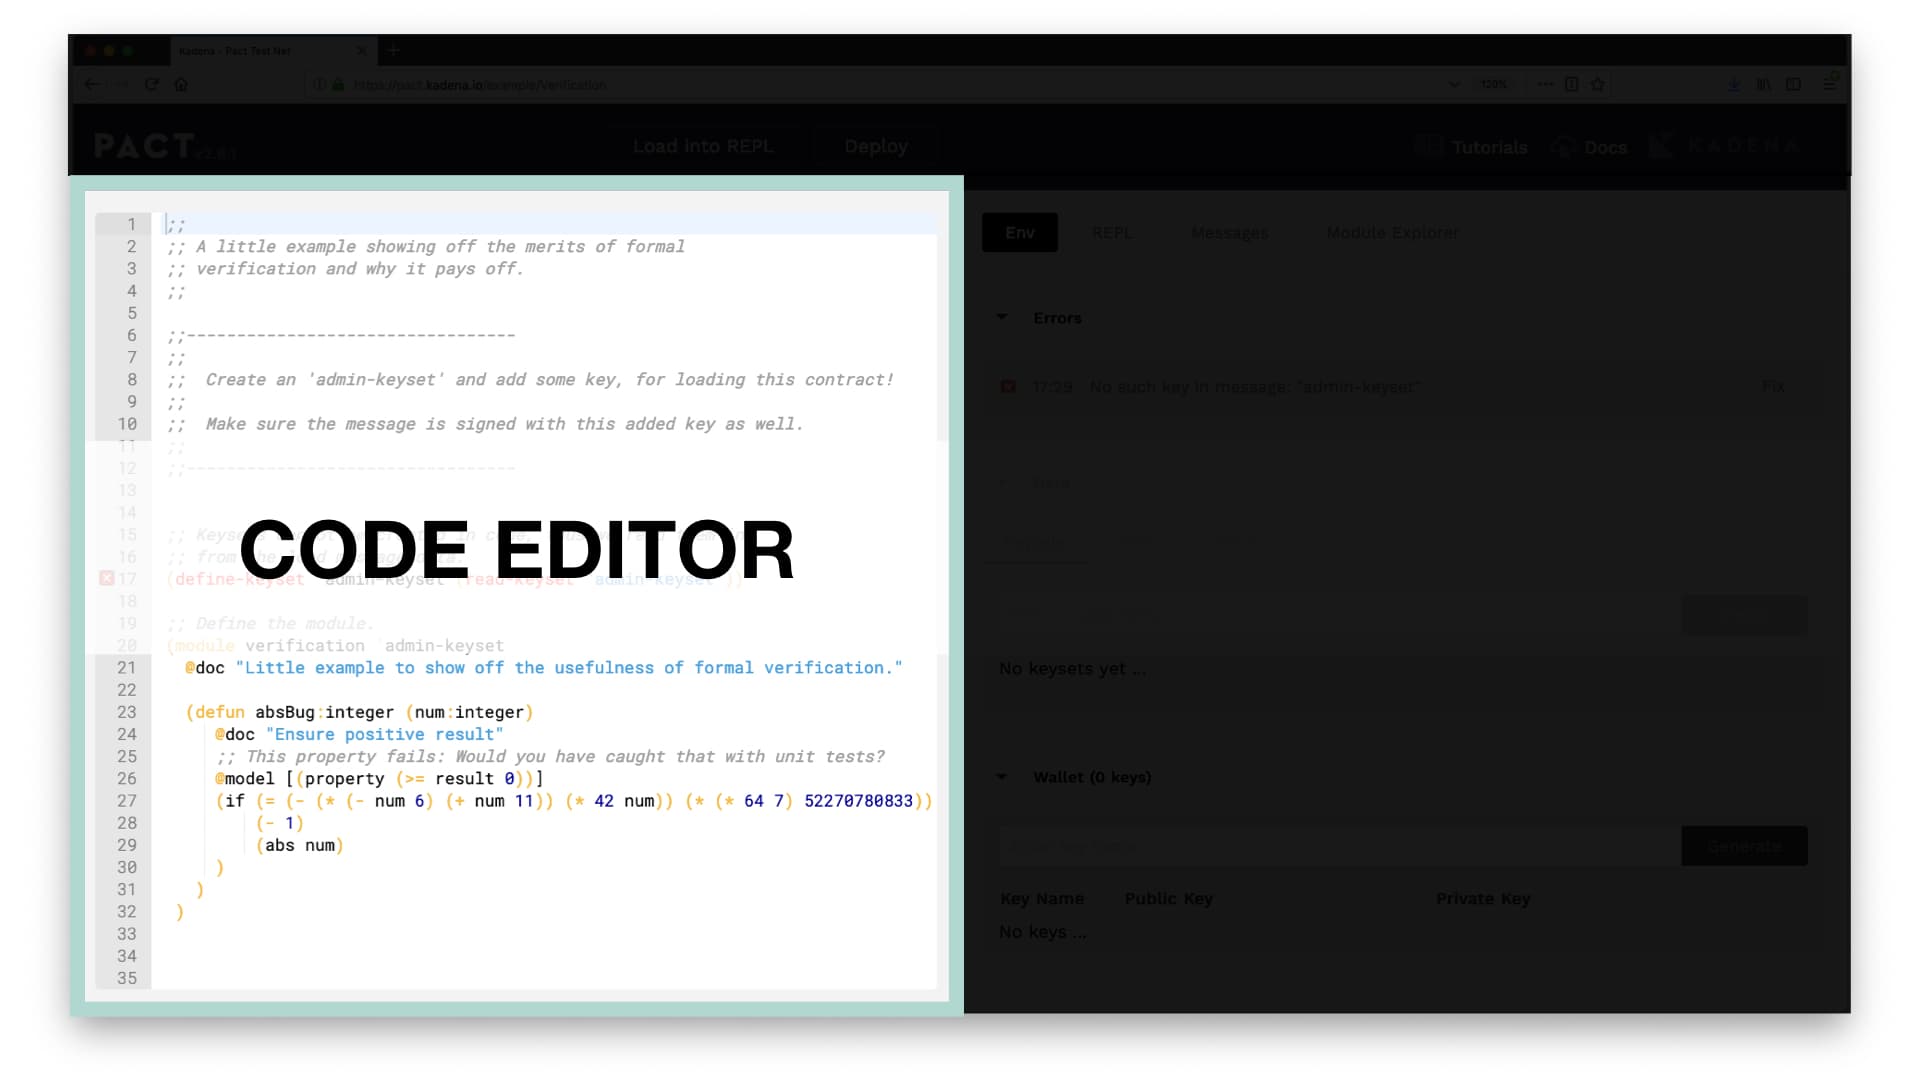
Inline Error Reporting
Inline error reporting ensures that you have clear direction on how to fix errors that may exist in your code.
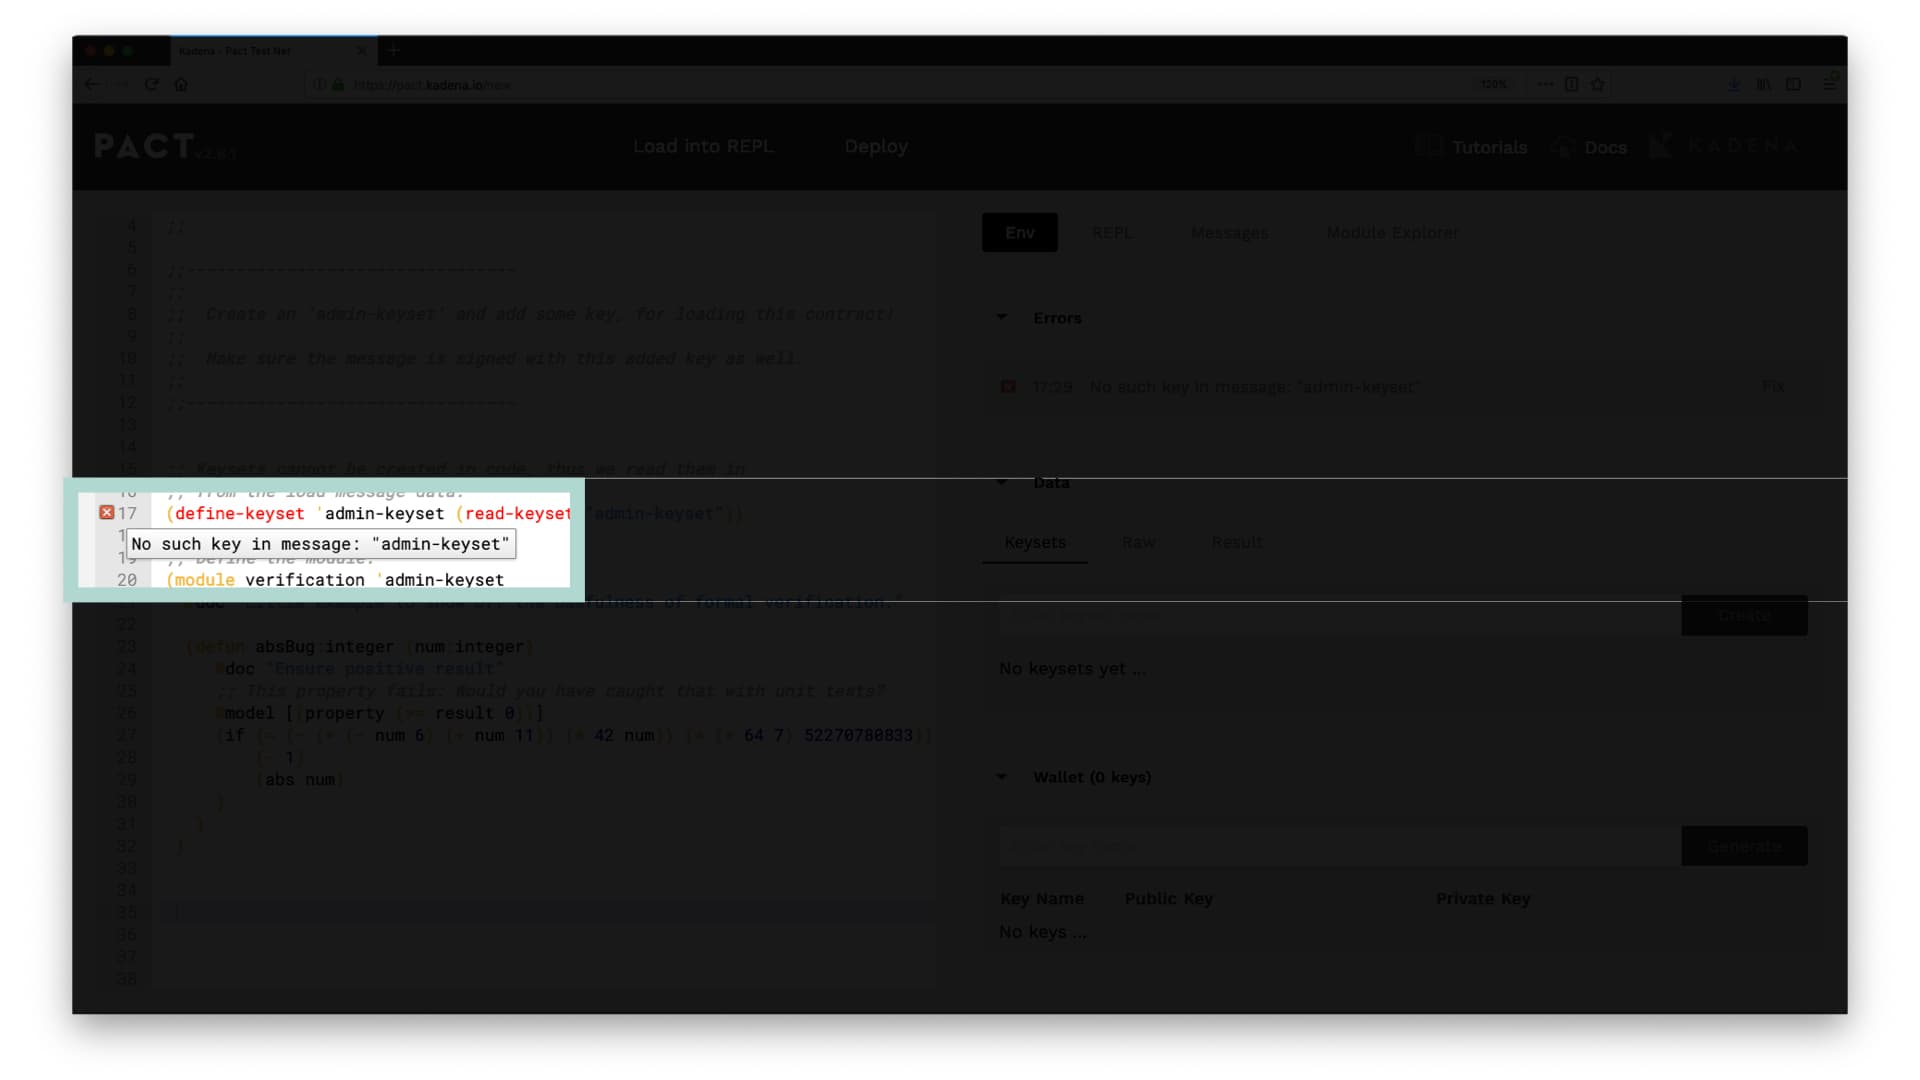
For example, if you look at line 17 of your smart contract you’ll see the error shown above. This and other errors types state the issue and help you to fix problems that may be affecting your smart contract.
You can fix this error by creating an admin-keyset. Creating an admin-keyset can be done using the tool panel which we’ll discuss more shortly.
Formal Verification
The online editor also supports formal verification. Formal verification is a process for automatically testing the correctness of your code. It mathematically proves that your contract has absolutely no security vulnerabilities. It also alerts you to any potential errors and vulnerabilities helping you create secure code quickly and effectively.
Formal verification is a tremendous innovation for smart contract languages. For more information on how this helps you develop safer smart contracts, read our Medium post
Tool Panel
The tool panel gives you access to many beneficial features while developing smart contracts. It helps you set-up your environment, run commands in the interactive REPL, read messages, and explore other modules that exist on the network.
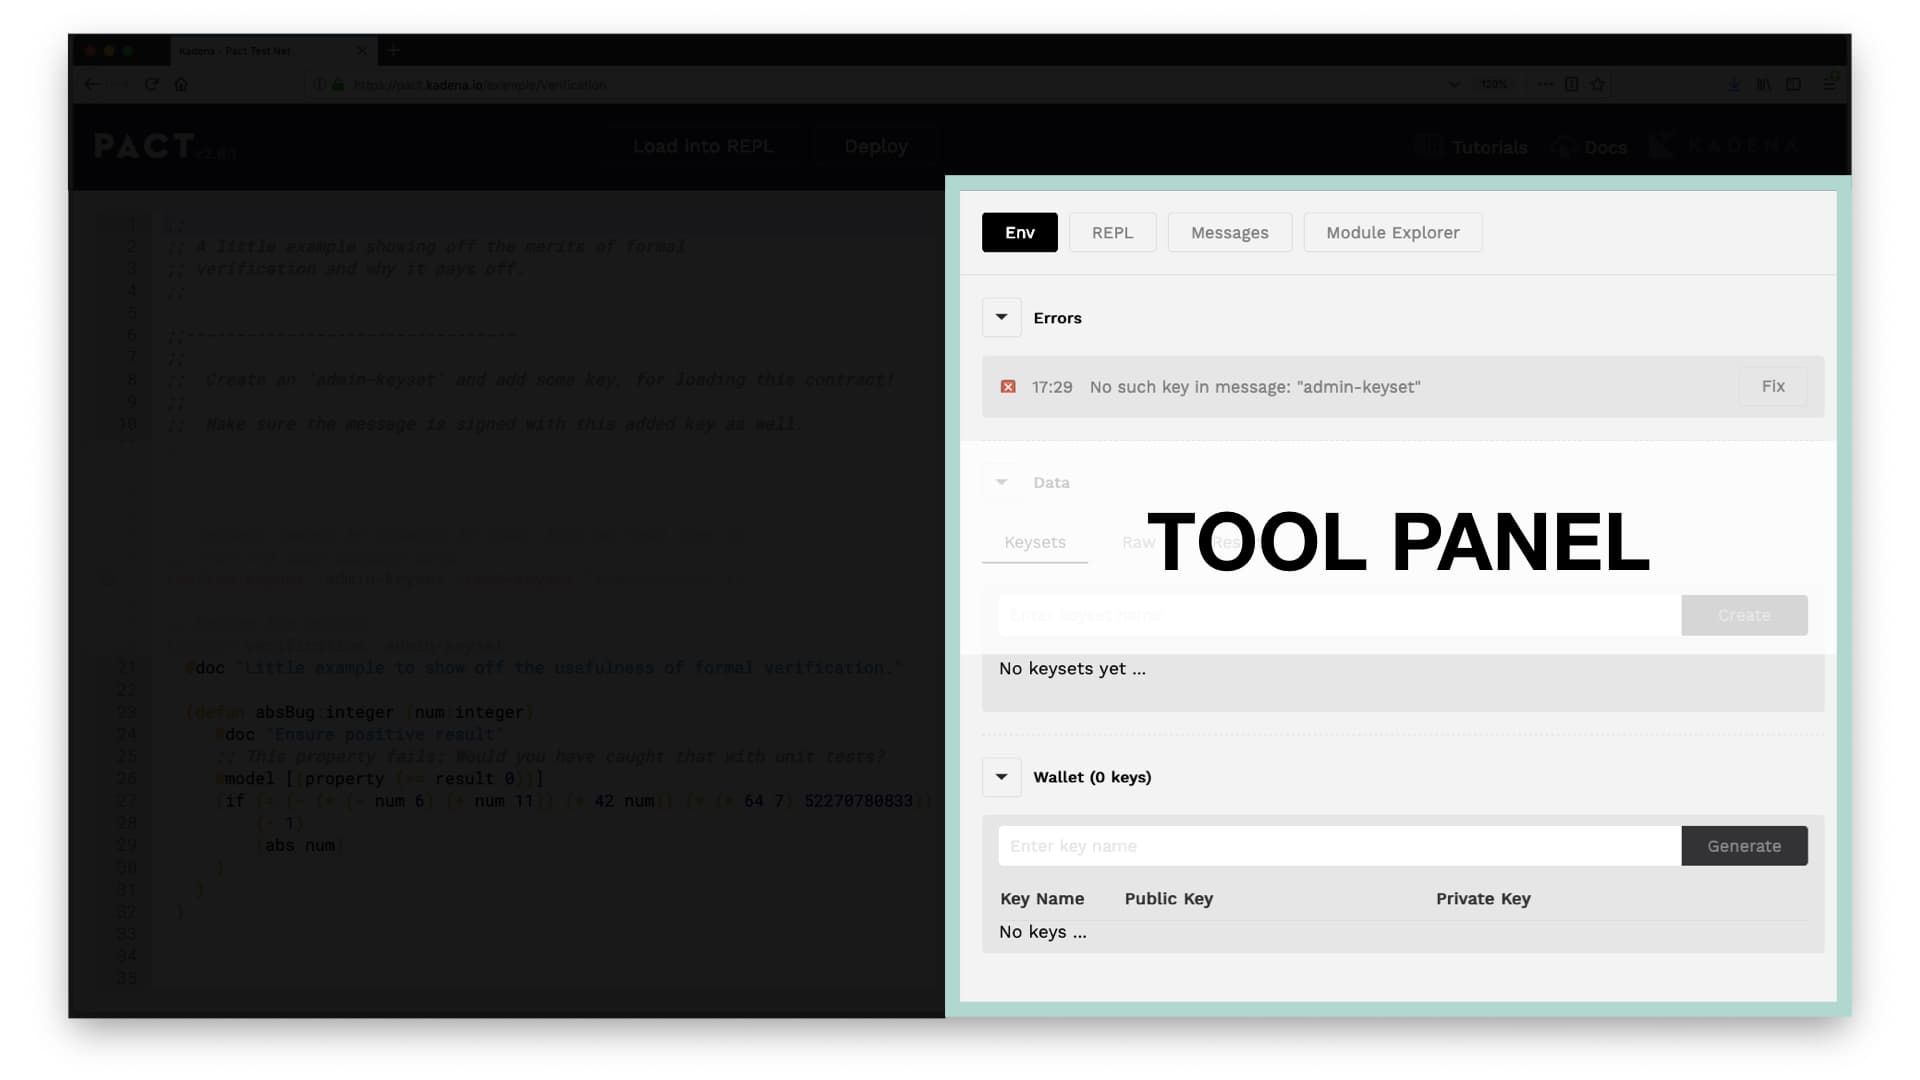
Env
The first option available to you in the tool panel is the environment. Select Env to view sections for addressing errors and creating and managing data and wallets from the UI.
Manage Errors
Errors can be viewed and fixed using the errors section. As you can see here, it currently shows an error that there is no such key in the message ‘admin-keyset’. This error is the same as what you saw previously in the editor.
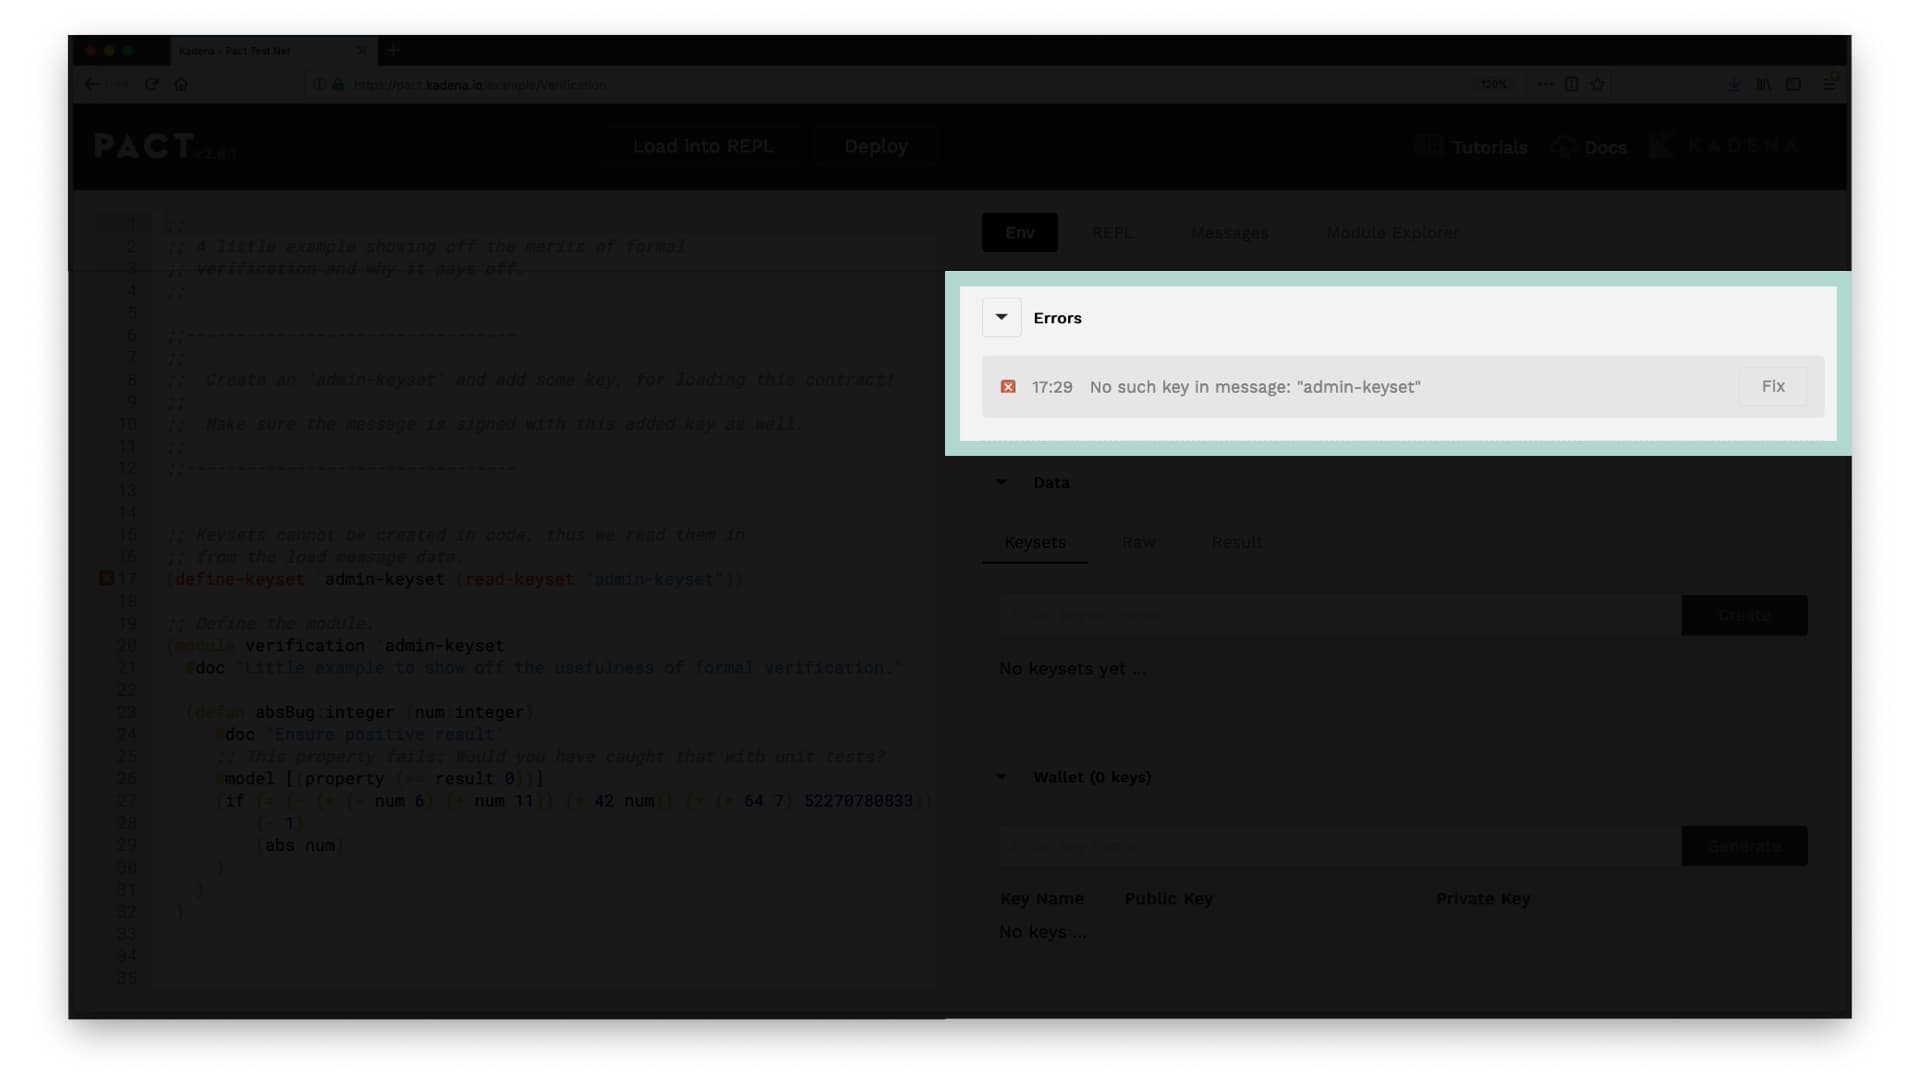
To fix this error, select the fix button on the right side of the screen. As you’ll see, this creates a keyset for you in the data section below. This along with many other errors and warnings can be fixed using this simple tool.
Coming up you’ll see how to create this keyset manually. Remove the admin-keyset by selecting the x to the right of the recently created keyset.
Create and Manage Keysets
The data section allows you to create and manage keysets. To get started, select the input Enter Keyset Name > type admin-keyset > then click create.
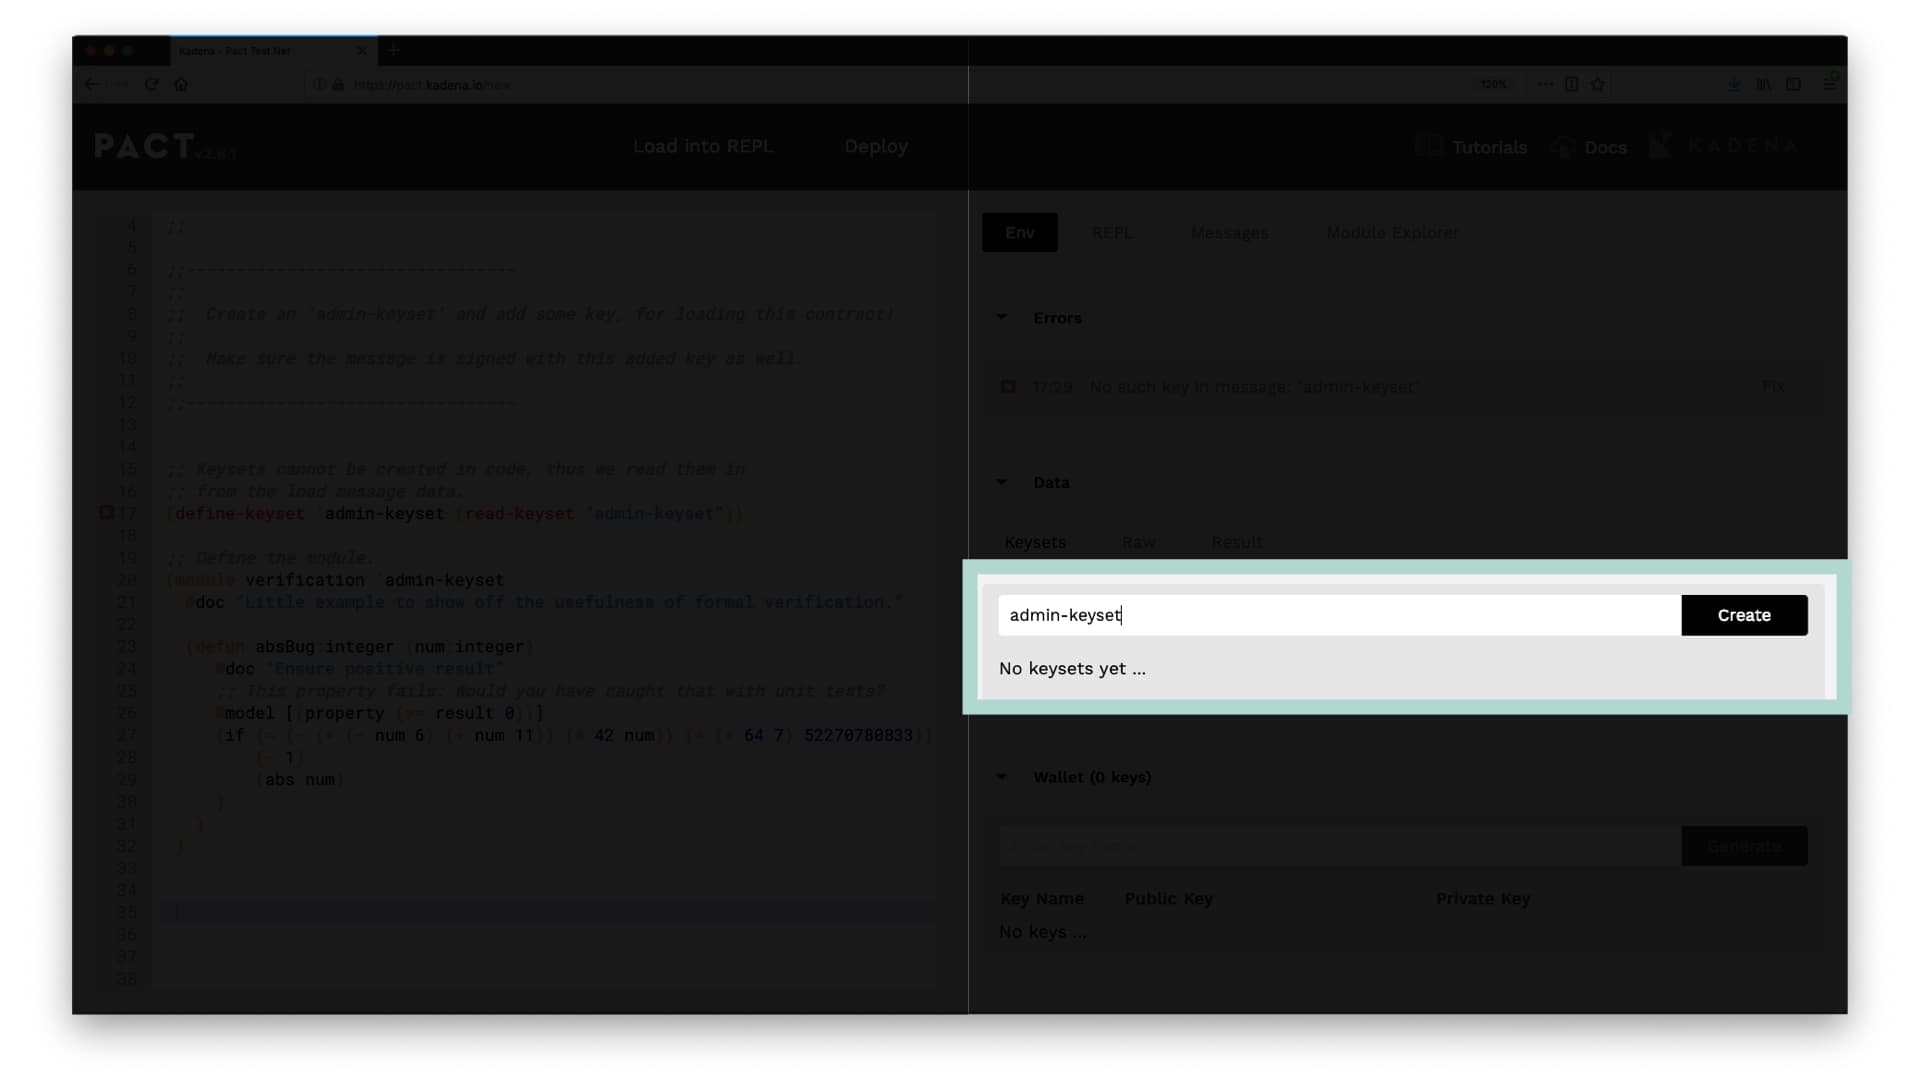
You should now see admin-keyset appear under your list of available keysets.
You can delete keys using the x over on the right.
You’ll also see a dropdown that allows you to select keys-all, keys-2, and keys-any. These options refer to the number of key signatures required to validate a transaction. For more information on this and a more in-depth explanation of keys in Pact, see the tutorial on Pact Keysets.
Result
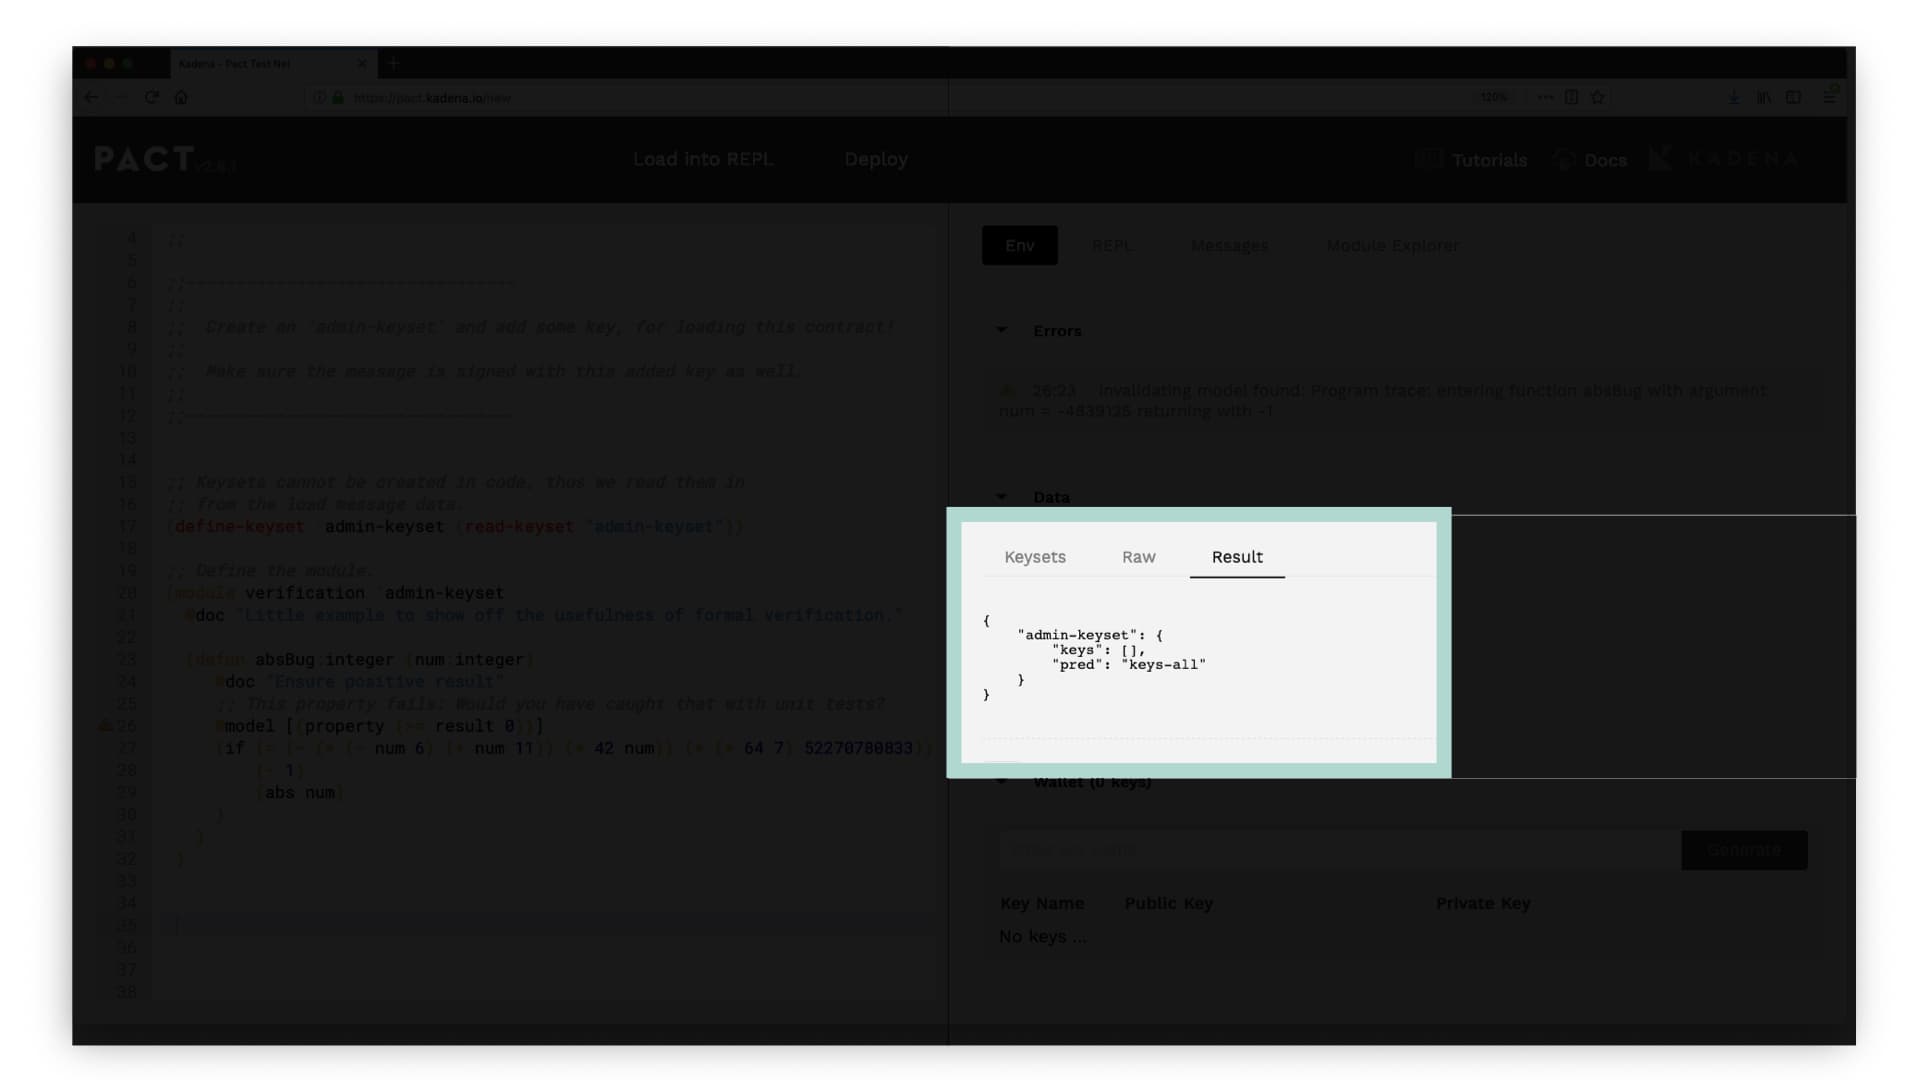
Each key created has a JSON representation available for programmatic access. In the Result tab, you can see the keys you have created shown in JSON.
Raw
You can also create keysets using the JSON format rather than the user interface. Creating keysets with JSON is done using the Raw tab.
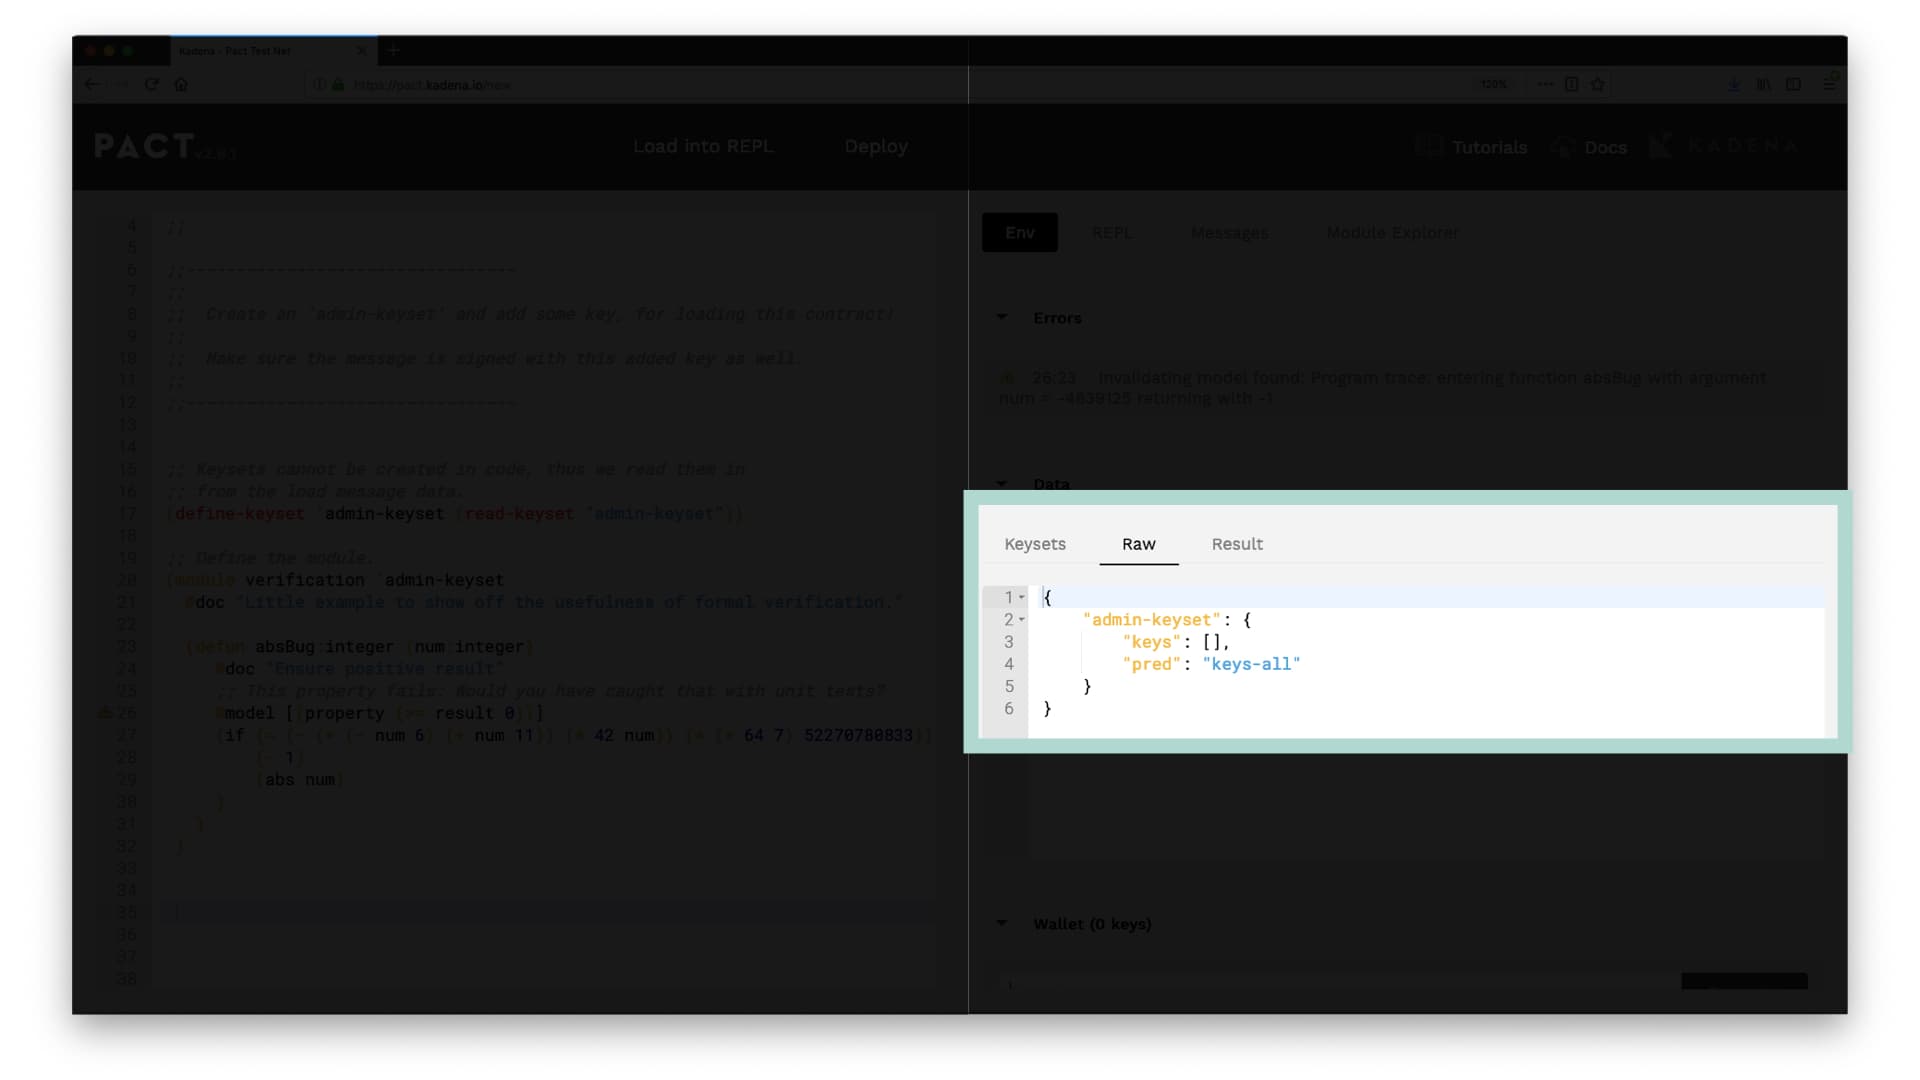
To create a new key, specify a keyset name, keys, and pred, similar to the format seen in the Result tab.
Pred Stands for “Predicate Function”. A predicate function is a boolean value function evaluating to either true or false. In this case, it will be one of the options keys-any, keys-2, or keys-all as you had seen in the keysets tab. Predicate functions specify which keys need to sign the transaction for it to be valid.
Add Key
As the name suggests, keysets are used to hold keys. You can create these keys in the section below Data named Wallet. To create a wallet, first, enter a key name then select Generate. I’ll name mine admin-key, but you can choose whatever you’d like
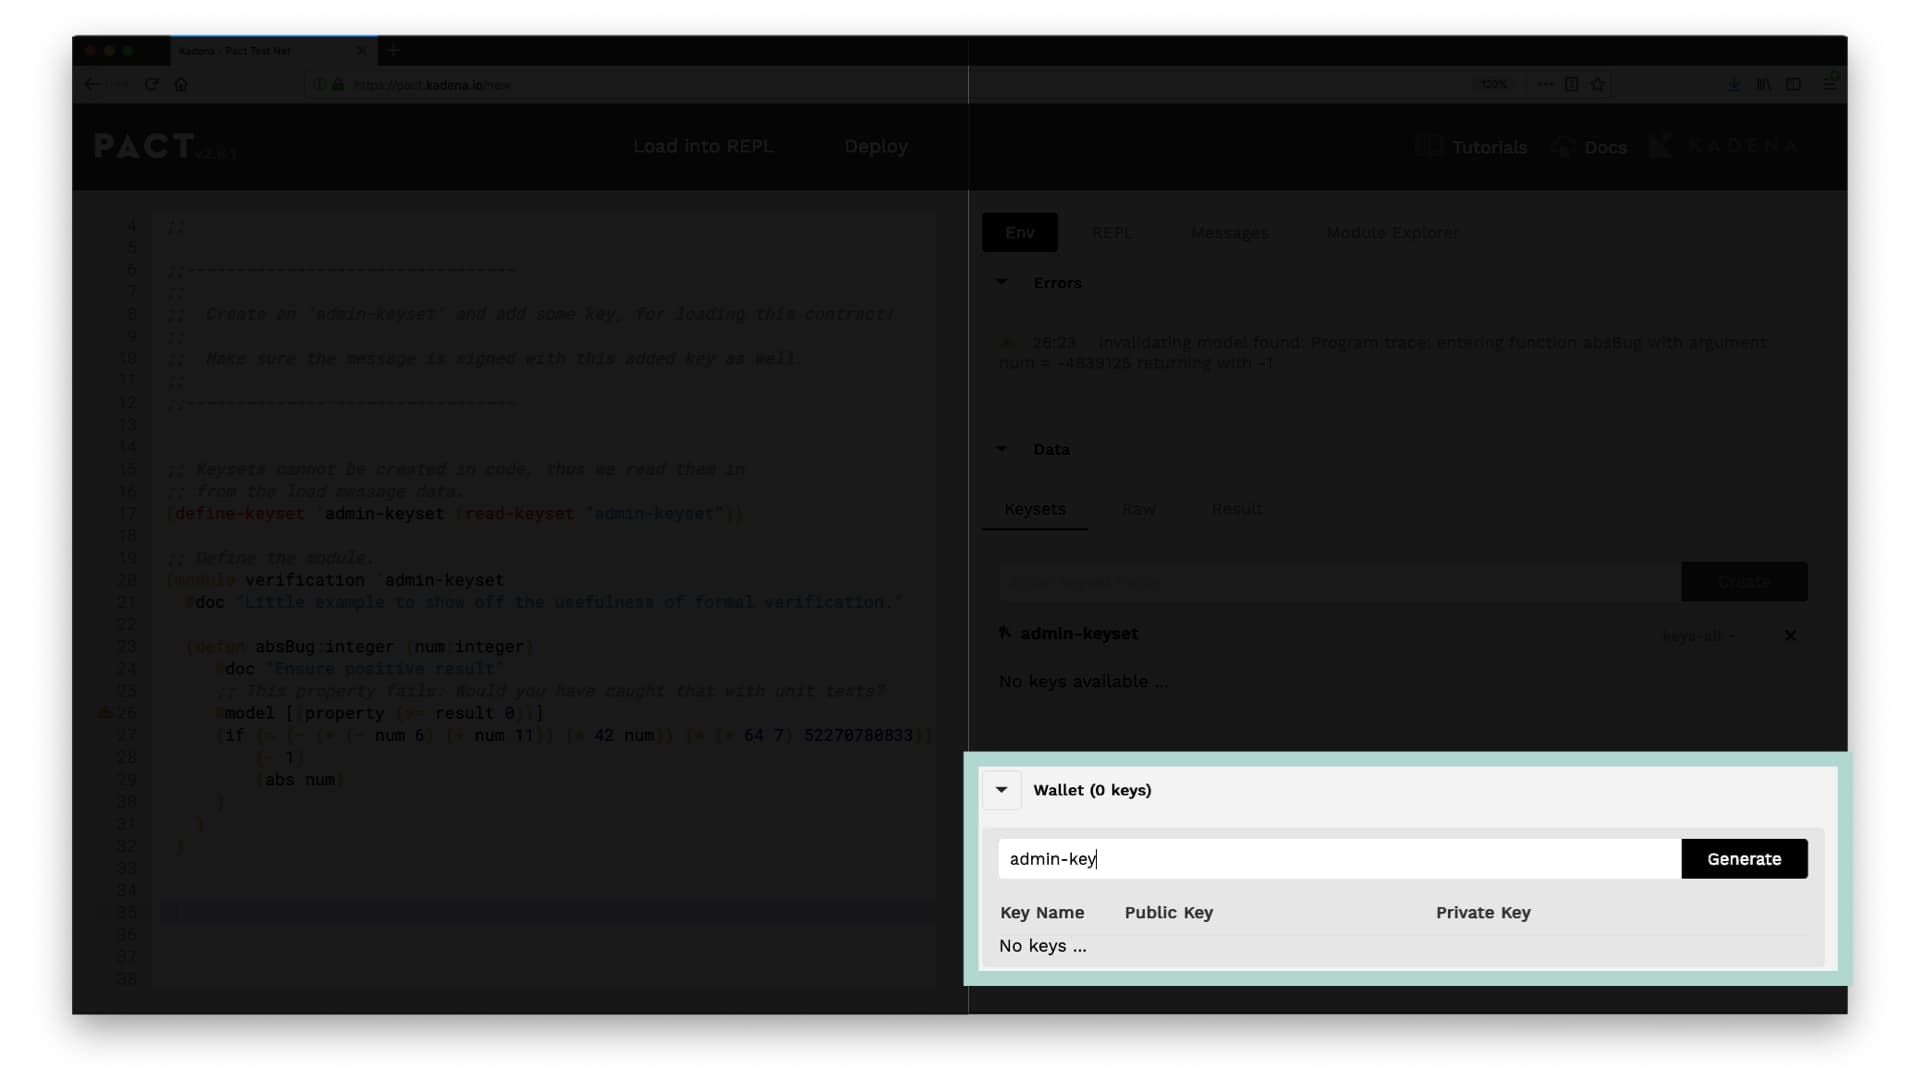
You should now see the key name, the public key, and the private key you generated. This key is useful any time you'd like to deploy or interact with a smart contract.
REPL
A great way to get started with Pact is to jump in and start writing code for yourself. The REPL helps you to do this quickly and allows you to run Pact commands from directly within the browser.

Try running some of the commands shown below to get started with the REPL.
Add numbers
Pact uses prefix notation for math operators. Prefix notation is standard in LISP-like languages like Pact. What this means is that the operator precedes the two values it’s operating on.
(+ 2 2)4(+ 2 2)4Strings
Concatenate strings using +. Try saying Hello REPL.
pact > (+ "Hello" " REPL")“Hello REPL”pact > (+ "Hello" " REPL")“Hello REPL”You can view many more commands in the
Pact Syntax Documentation and Built-in Functions Documentation. Try running a few for yourself to learn more about the Pact programming language.
Run Commands from the Code Editor
It’s also possible to run REPL commands from the code editor. To get started, delete the existing code from the code editor and select REPL from the tool panel.
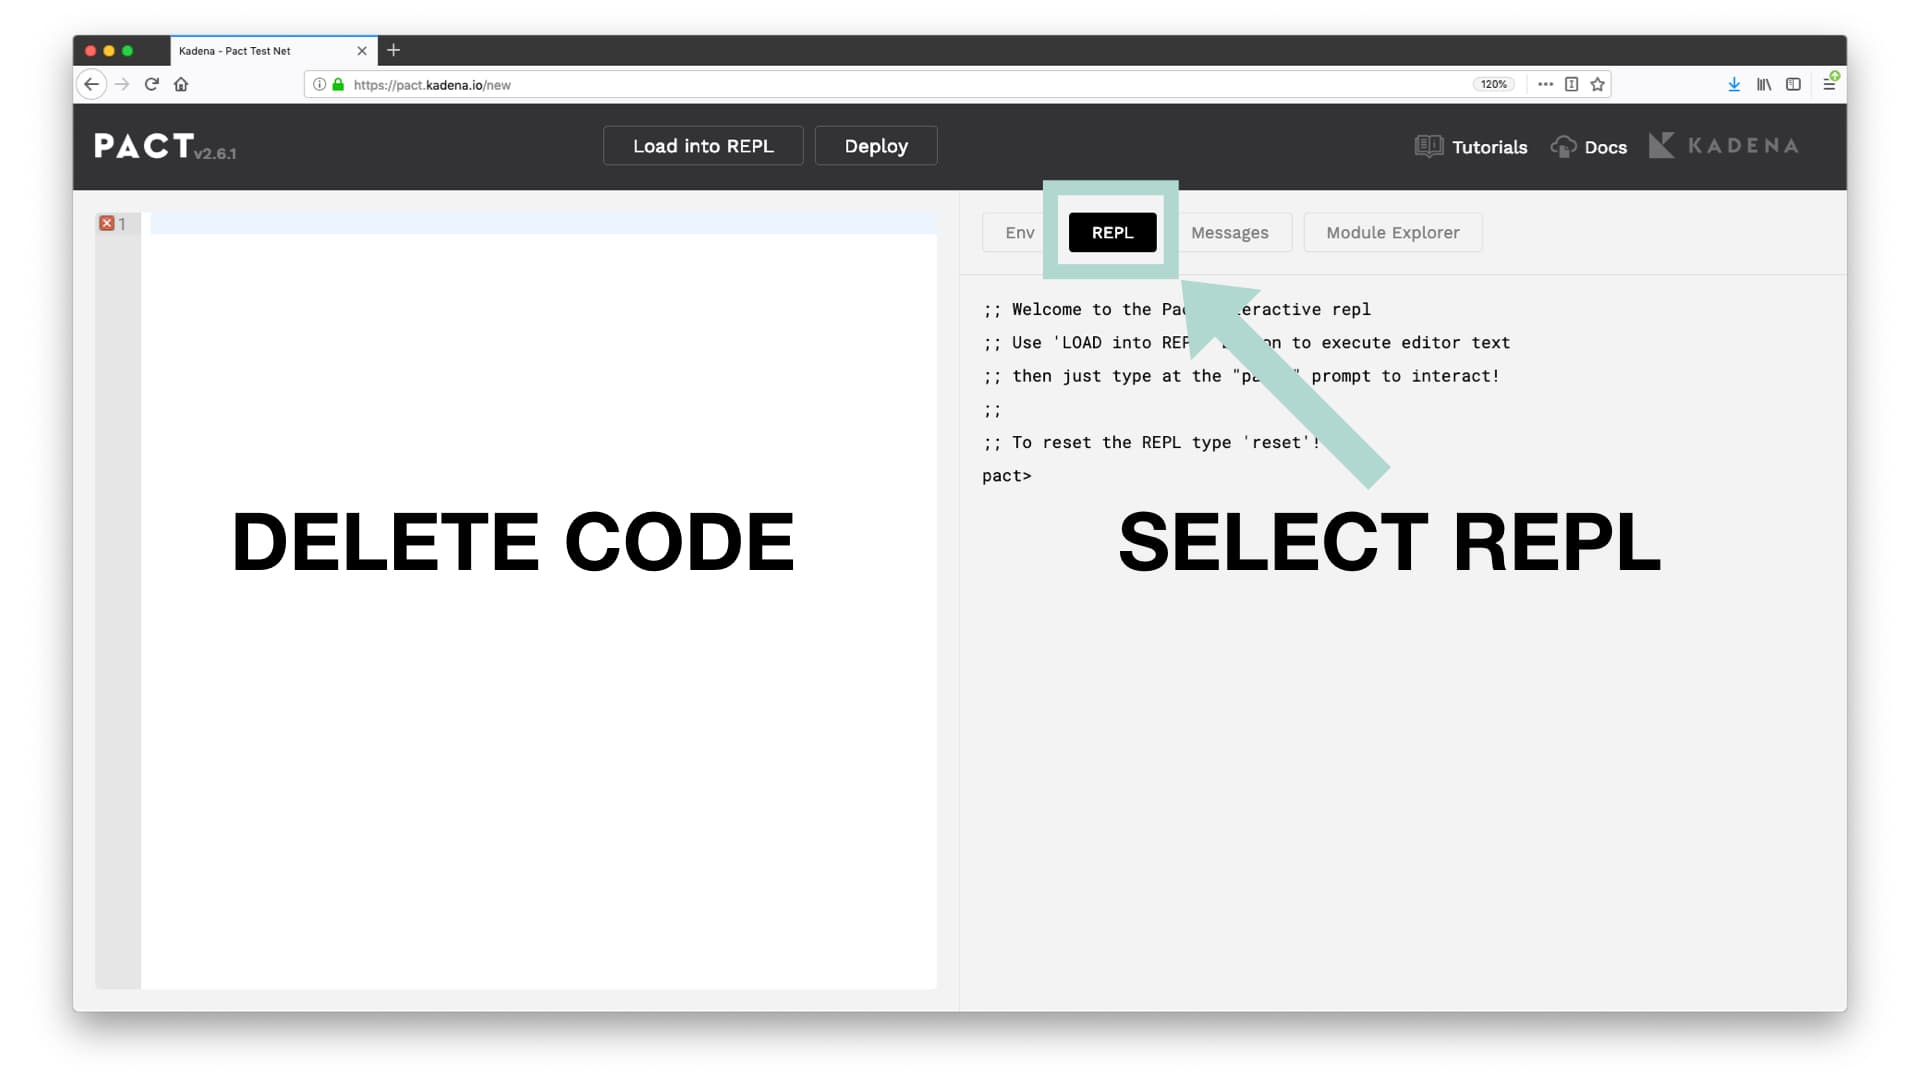
To run commands using the editor, enter a command and then select Load into REPL at the top of the screen. Experiment with other commands yourself by running some of the ones shown previously.
Messages
Code editors often provide messages to developers that help them identify errors and log outputs. These are useful ways to debug programs and fix potential issues with your contract. In the Chainweaver Web Pact Editor, these messages can be seen in the messages tab in the Toolbar.

Module Explorer
Another powerful tool provided by the editor is the Module Explorer. The module explorer allows you to load example contracts, deployed contracts, and to run functions that exist on any contracts that exist on the network!
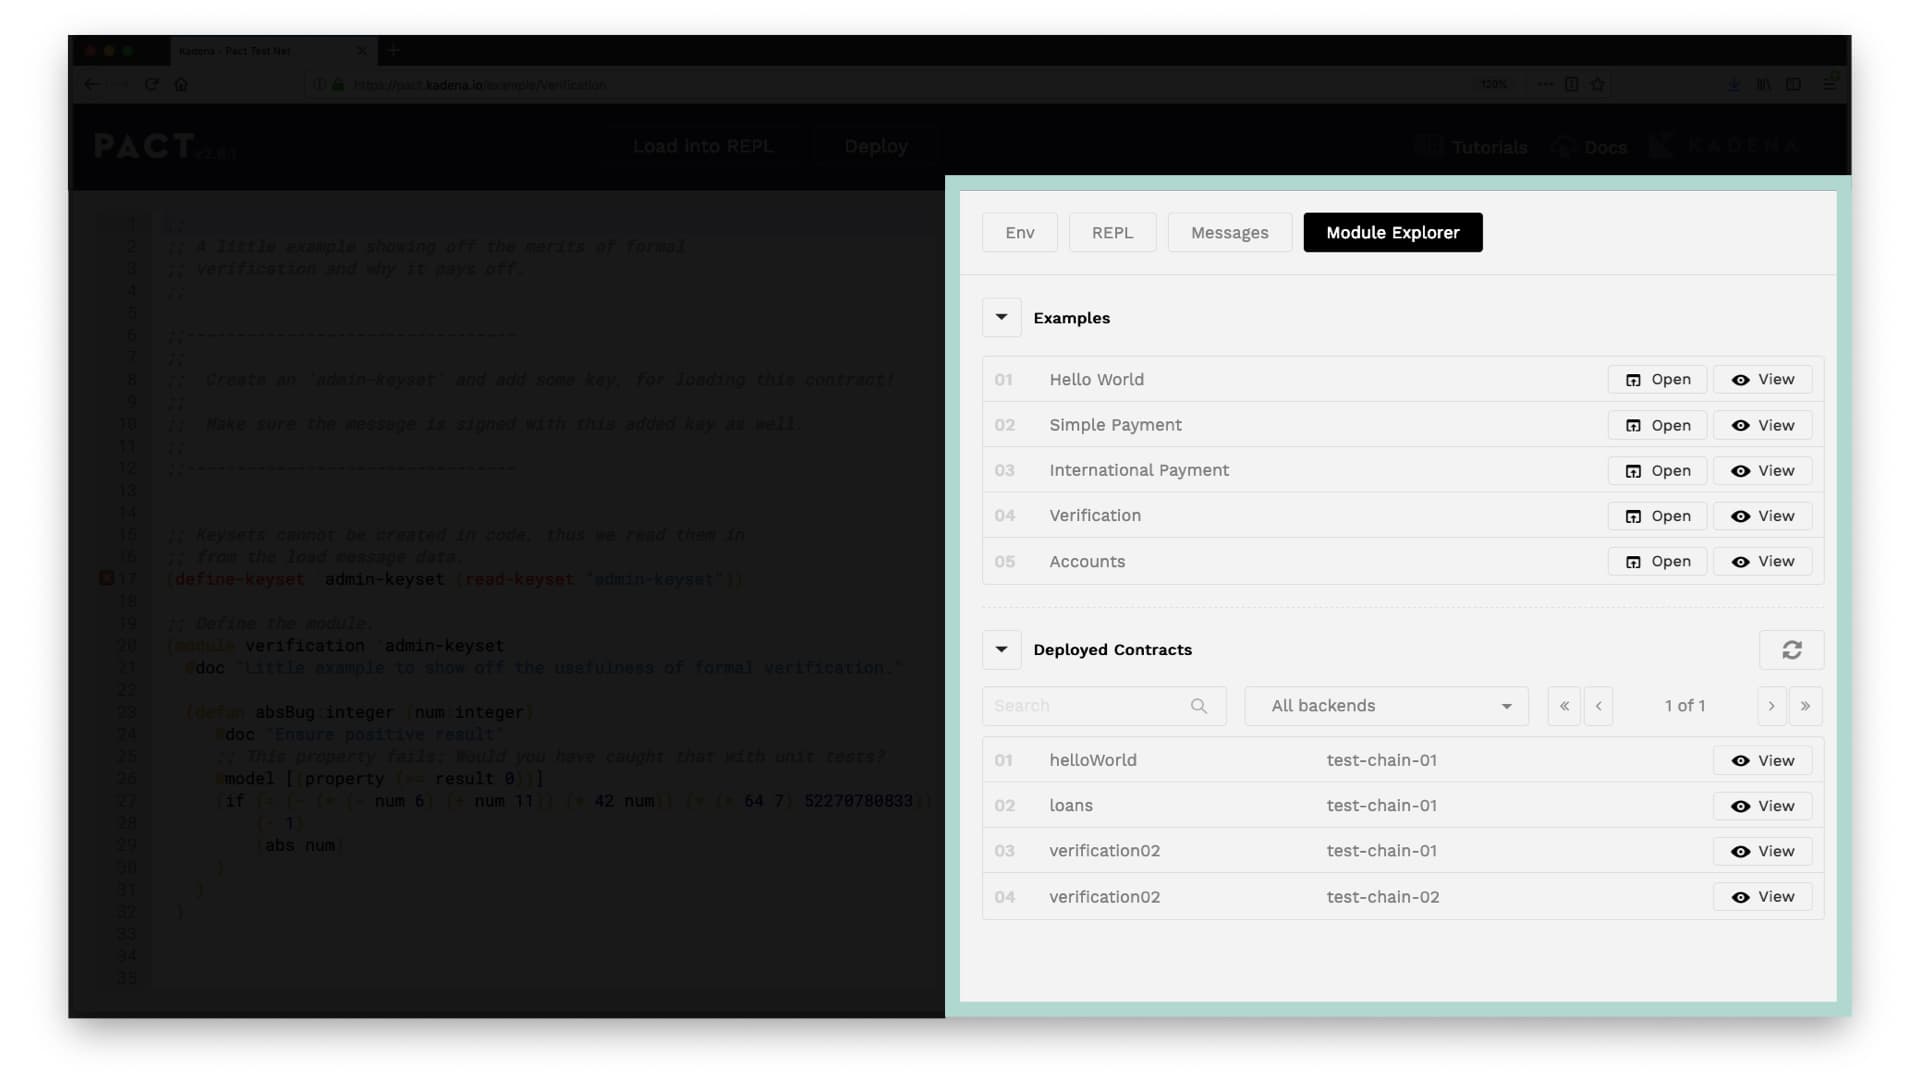
Click on the button module explorer to get started. Here you’ll see a section for example contracts and a section for deployed contracts.
Example Contracts
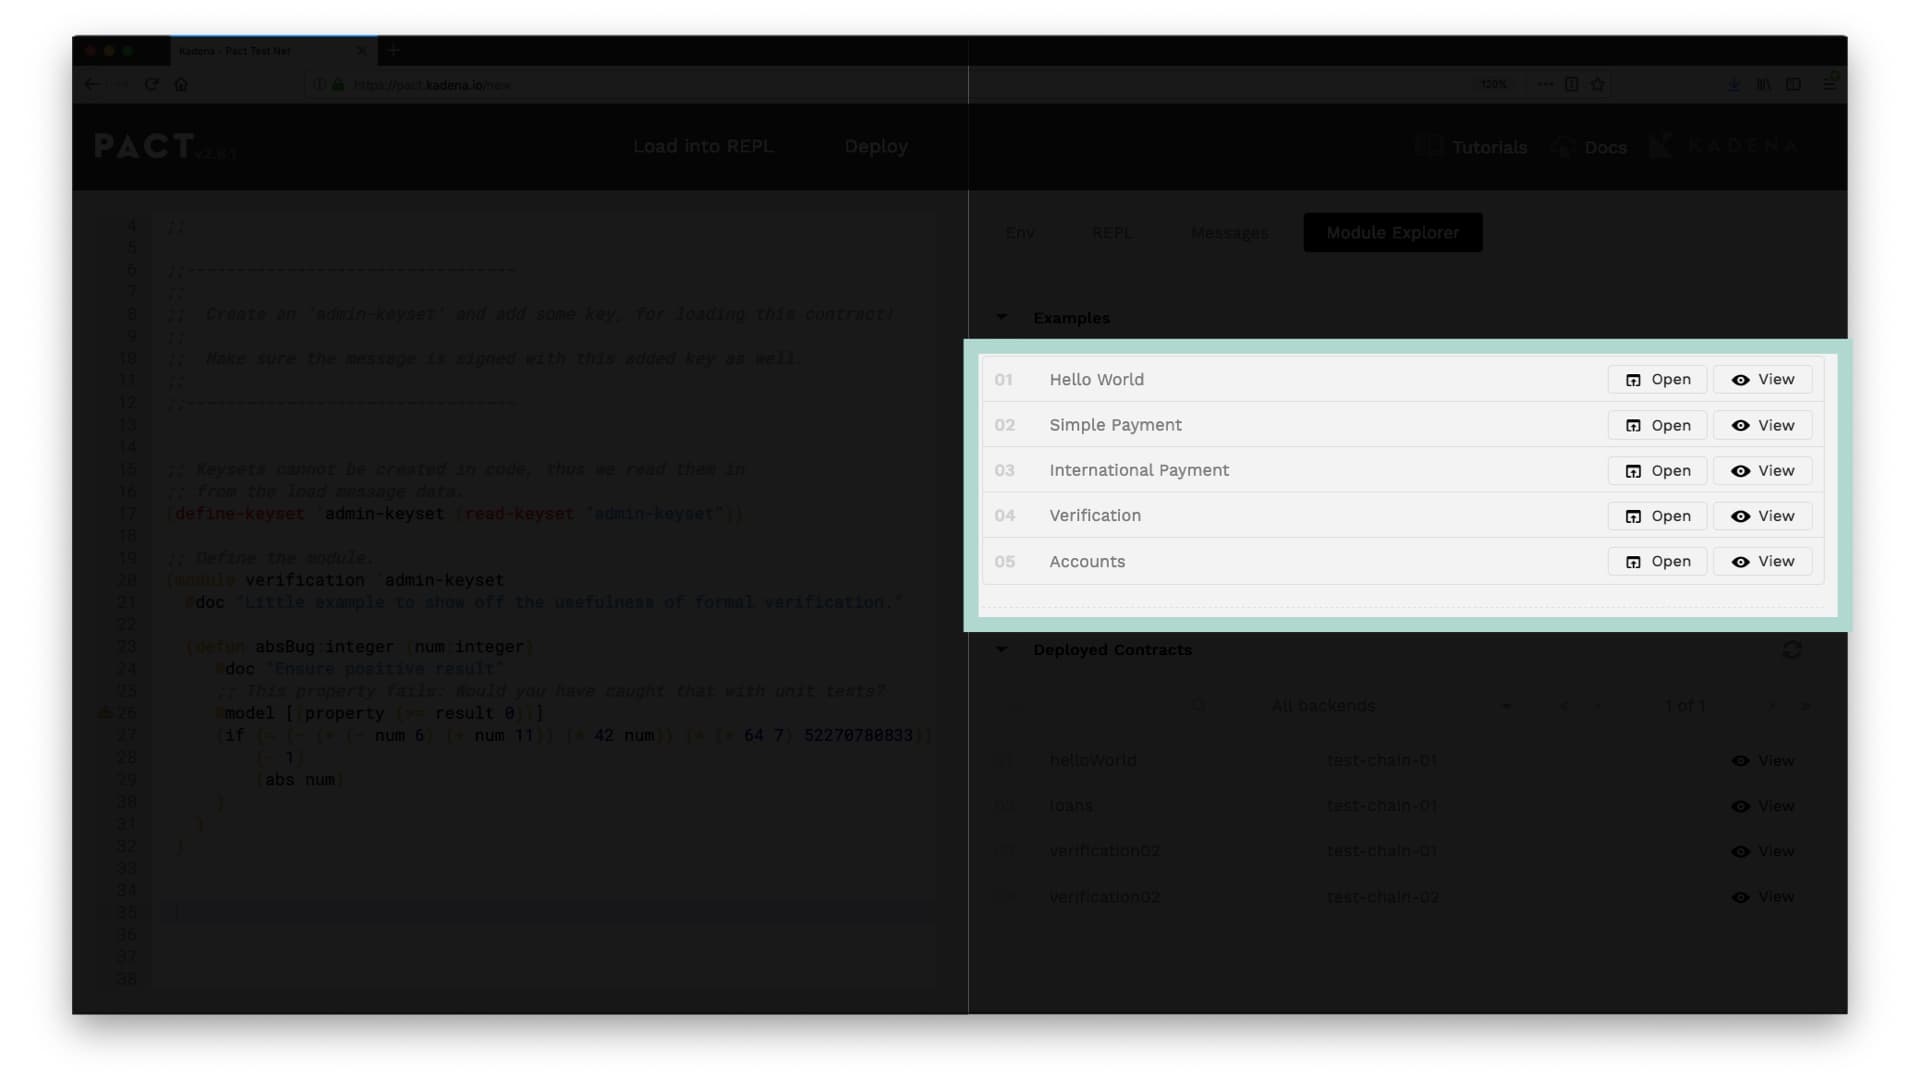
The example contracts section allows you to load example contracts directly into your editor. You can use this code however you’d like, and can always come back here to reload the code again if needed.
When you first loaded pact.kadena.io/ the Formal Verification contract shown here is automatically loaded. Select view > open to reload this contract.
You can also view other smart contracts. Select View > Open on any smart contract to load its code into the code editor.
View Functions
You can view a summary of functions that exist within any smart contract from within the module explorer. After selecting View, you will see an overview of these functions. The image below shows the functions in the example Simple Payment.
Deployed Contracts
You can also view any contract that has been deployed to the network using the Module Explorer.
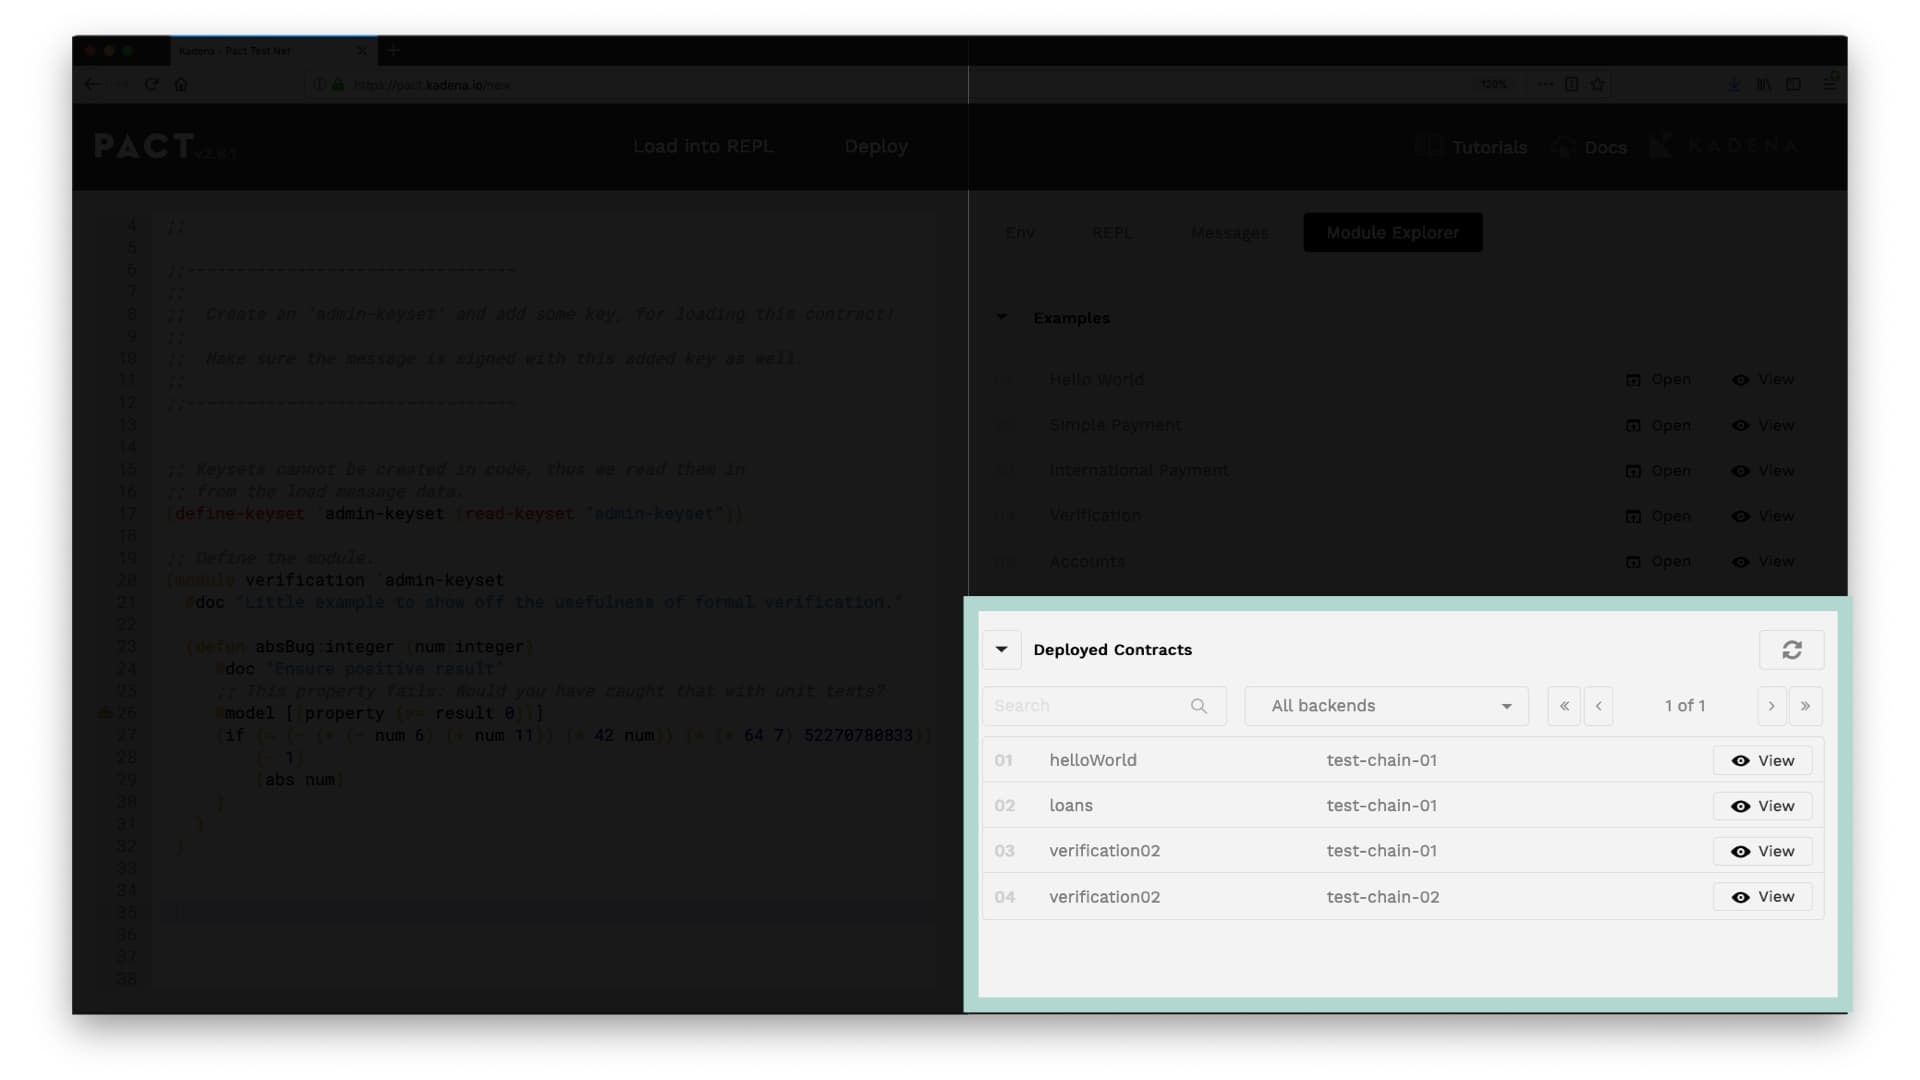
You can search by name, by chain, or by navigating the pages using the arrow buttons.
Once you find a particular contract, select view. From here you can look at each function on the contract, and when you’re ready, select open to see the contract code.
You can also call functions on modules from within the editor. For more information on calling functions, see Hello World with Pact.
Review
Congratulations! You have completed your introduction to the Chainweaver Web Pact Editor.
The Chainweaver Web Pact Editor is an excellent tool built to make developing smart contracts with Pact both fun and simple.
Topic Summary
Throughout this tutorial, you explored each core feature of the editor's interface. This included each of the following topics.
- Introduction to the Editor
- Navigation Bar
- Code Editor
- Tool Panel
Take some time now to explore each of the features we discussed and get used to navigating this new environment. As you continue with Pact, you’ll use this tool regularly to help explore new ideas, write smart contracts, manage keysets, and explore modules.
Throughout these tutorials, you’ll use this tool very often. By getting used to these core features, you're on your way to making amazing new applications using Pact.